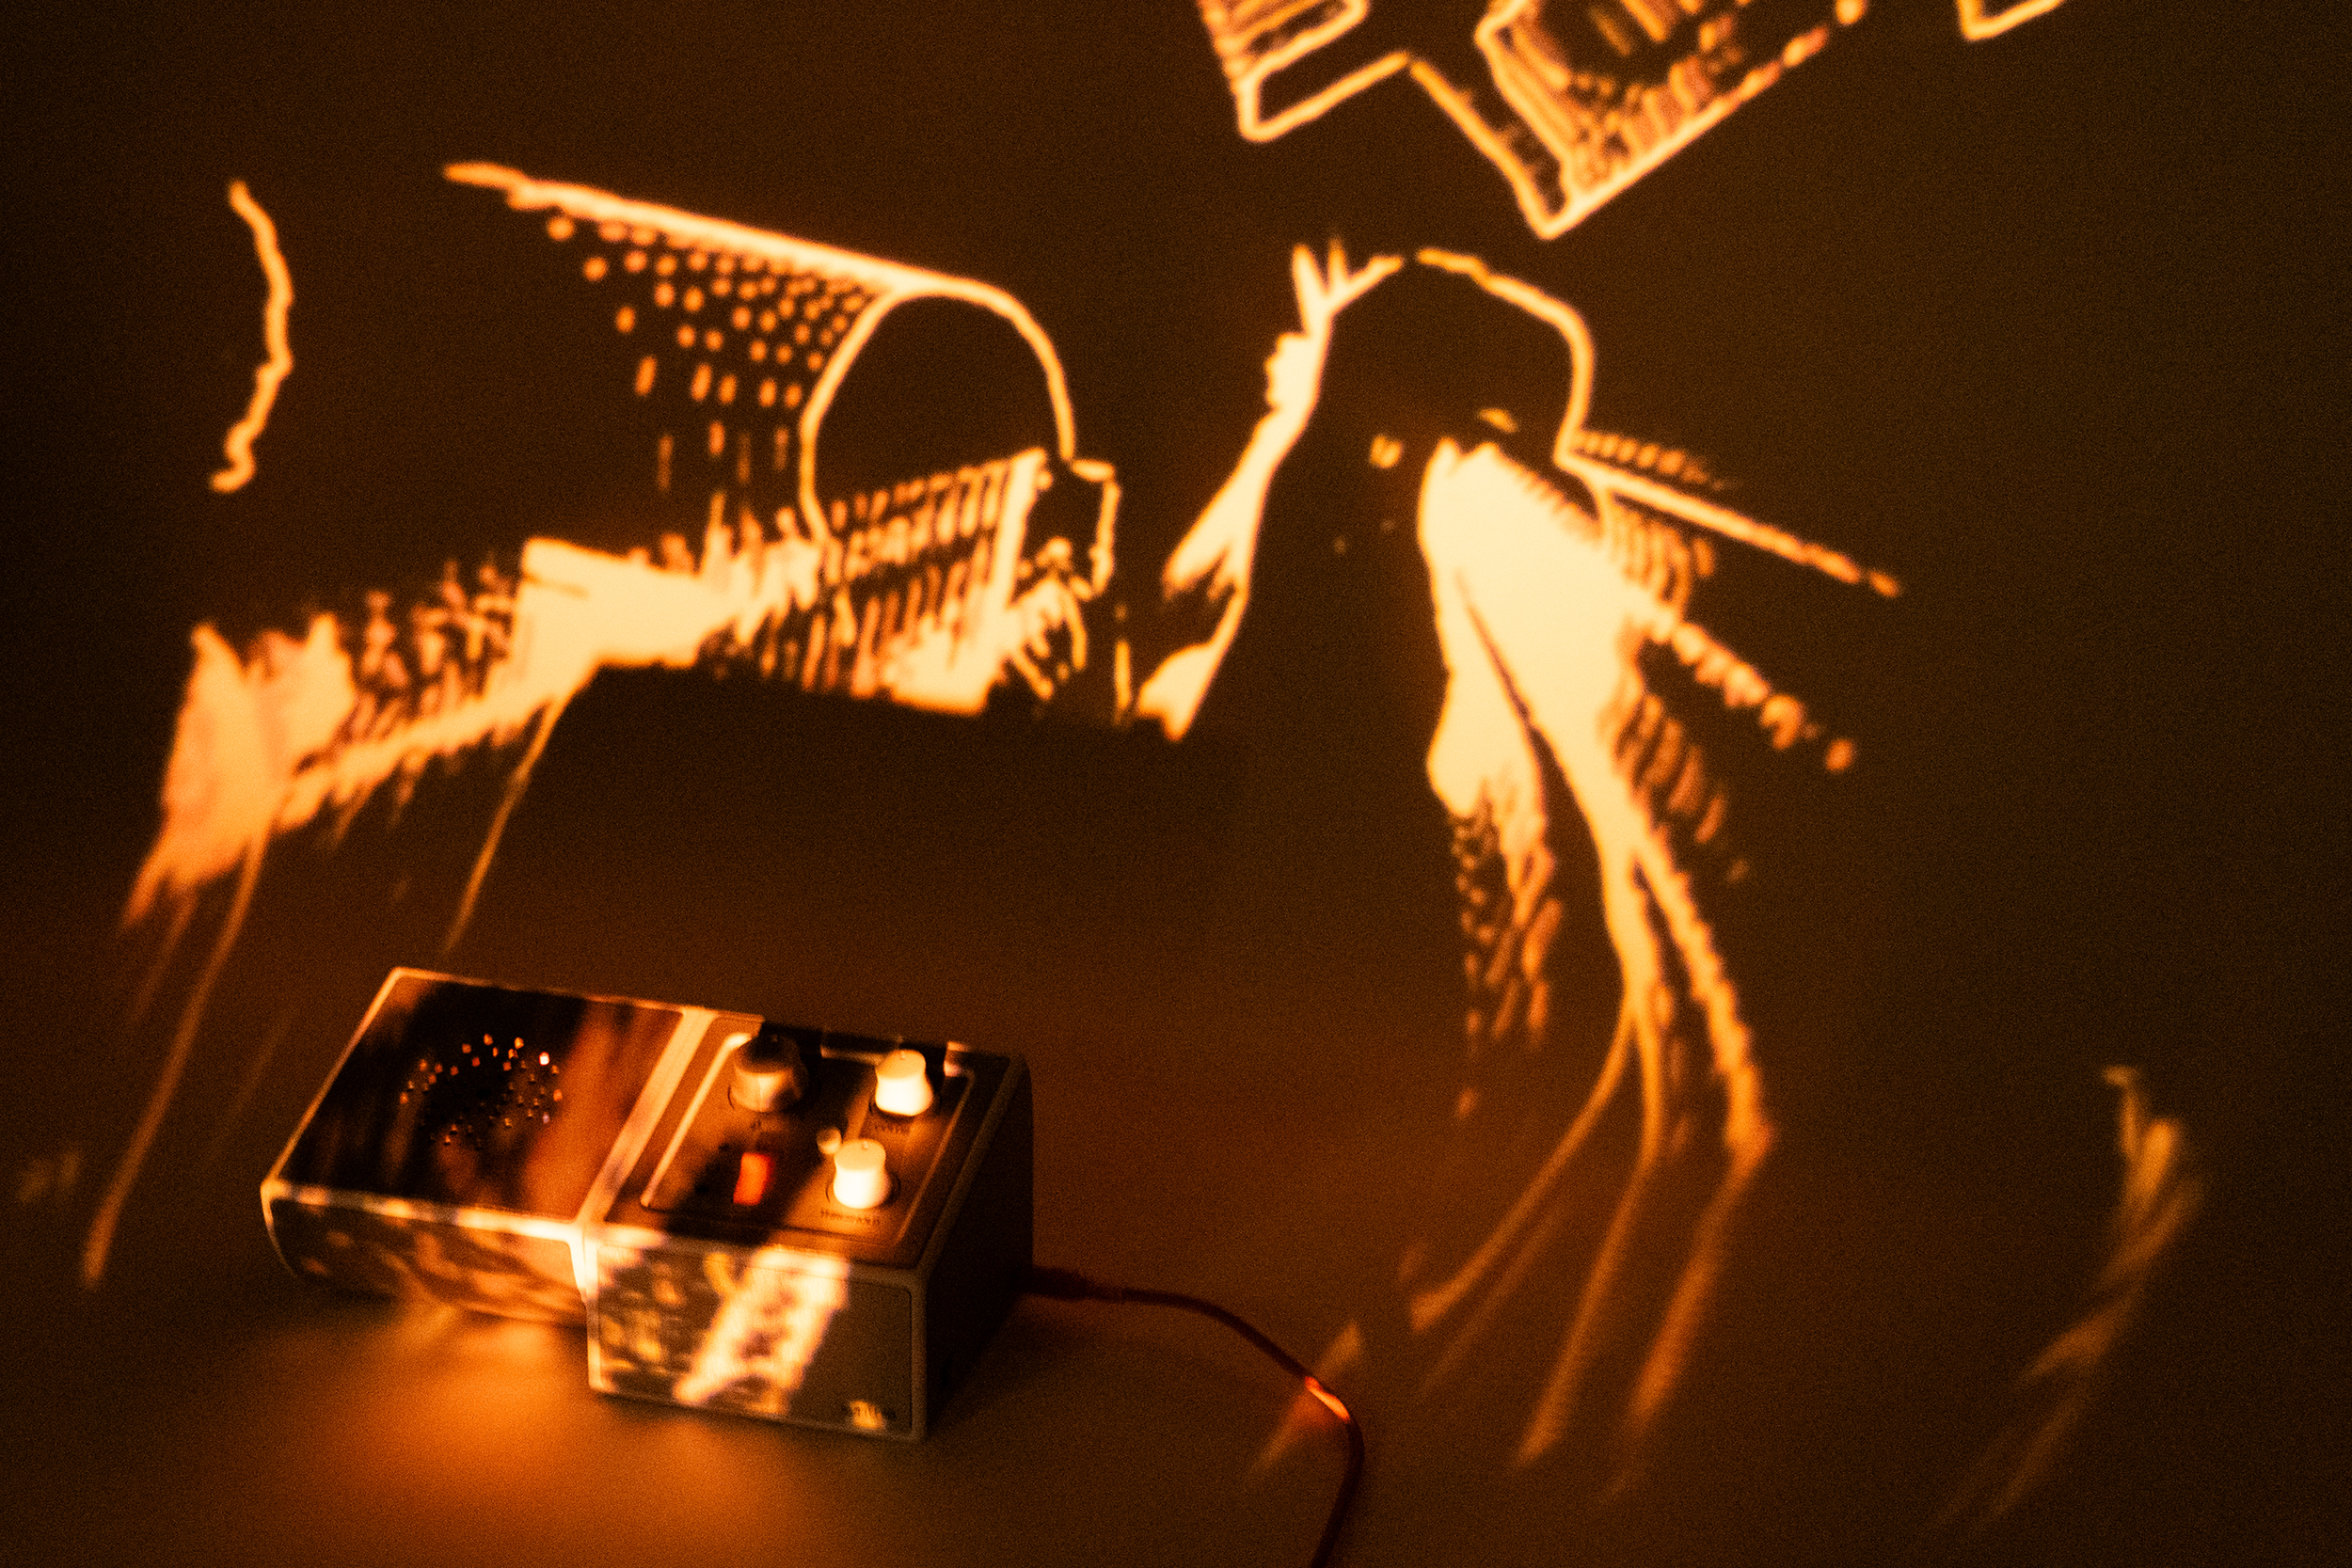
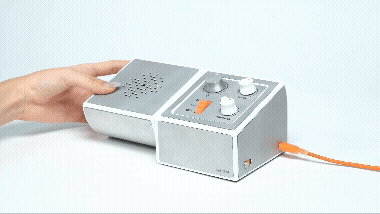
Synthia is a visual synthesizer that brings concert-level visuals to parties and gatherings in one’s home. Using ambient audio and live video, it creates audience-driven audio-reactive visuals that are then projected back at the room.
Synthia was built as a team for MIT Class 4.031: Objects and Interaction, with Joanne Hong and Joshua Camacho.
My Role: TouchDesigner, CAD, Manufacturing
User Interaction:
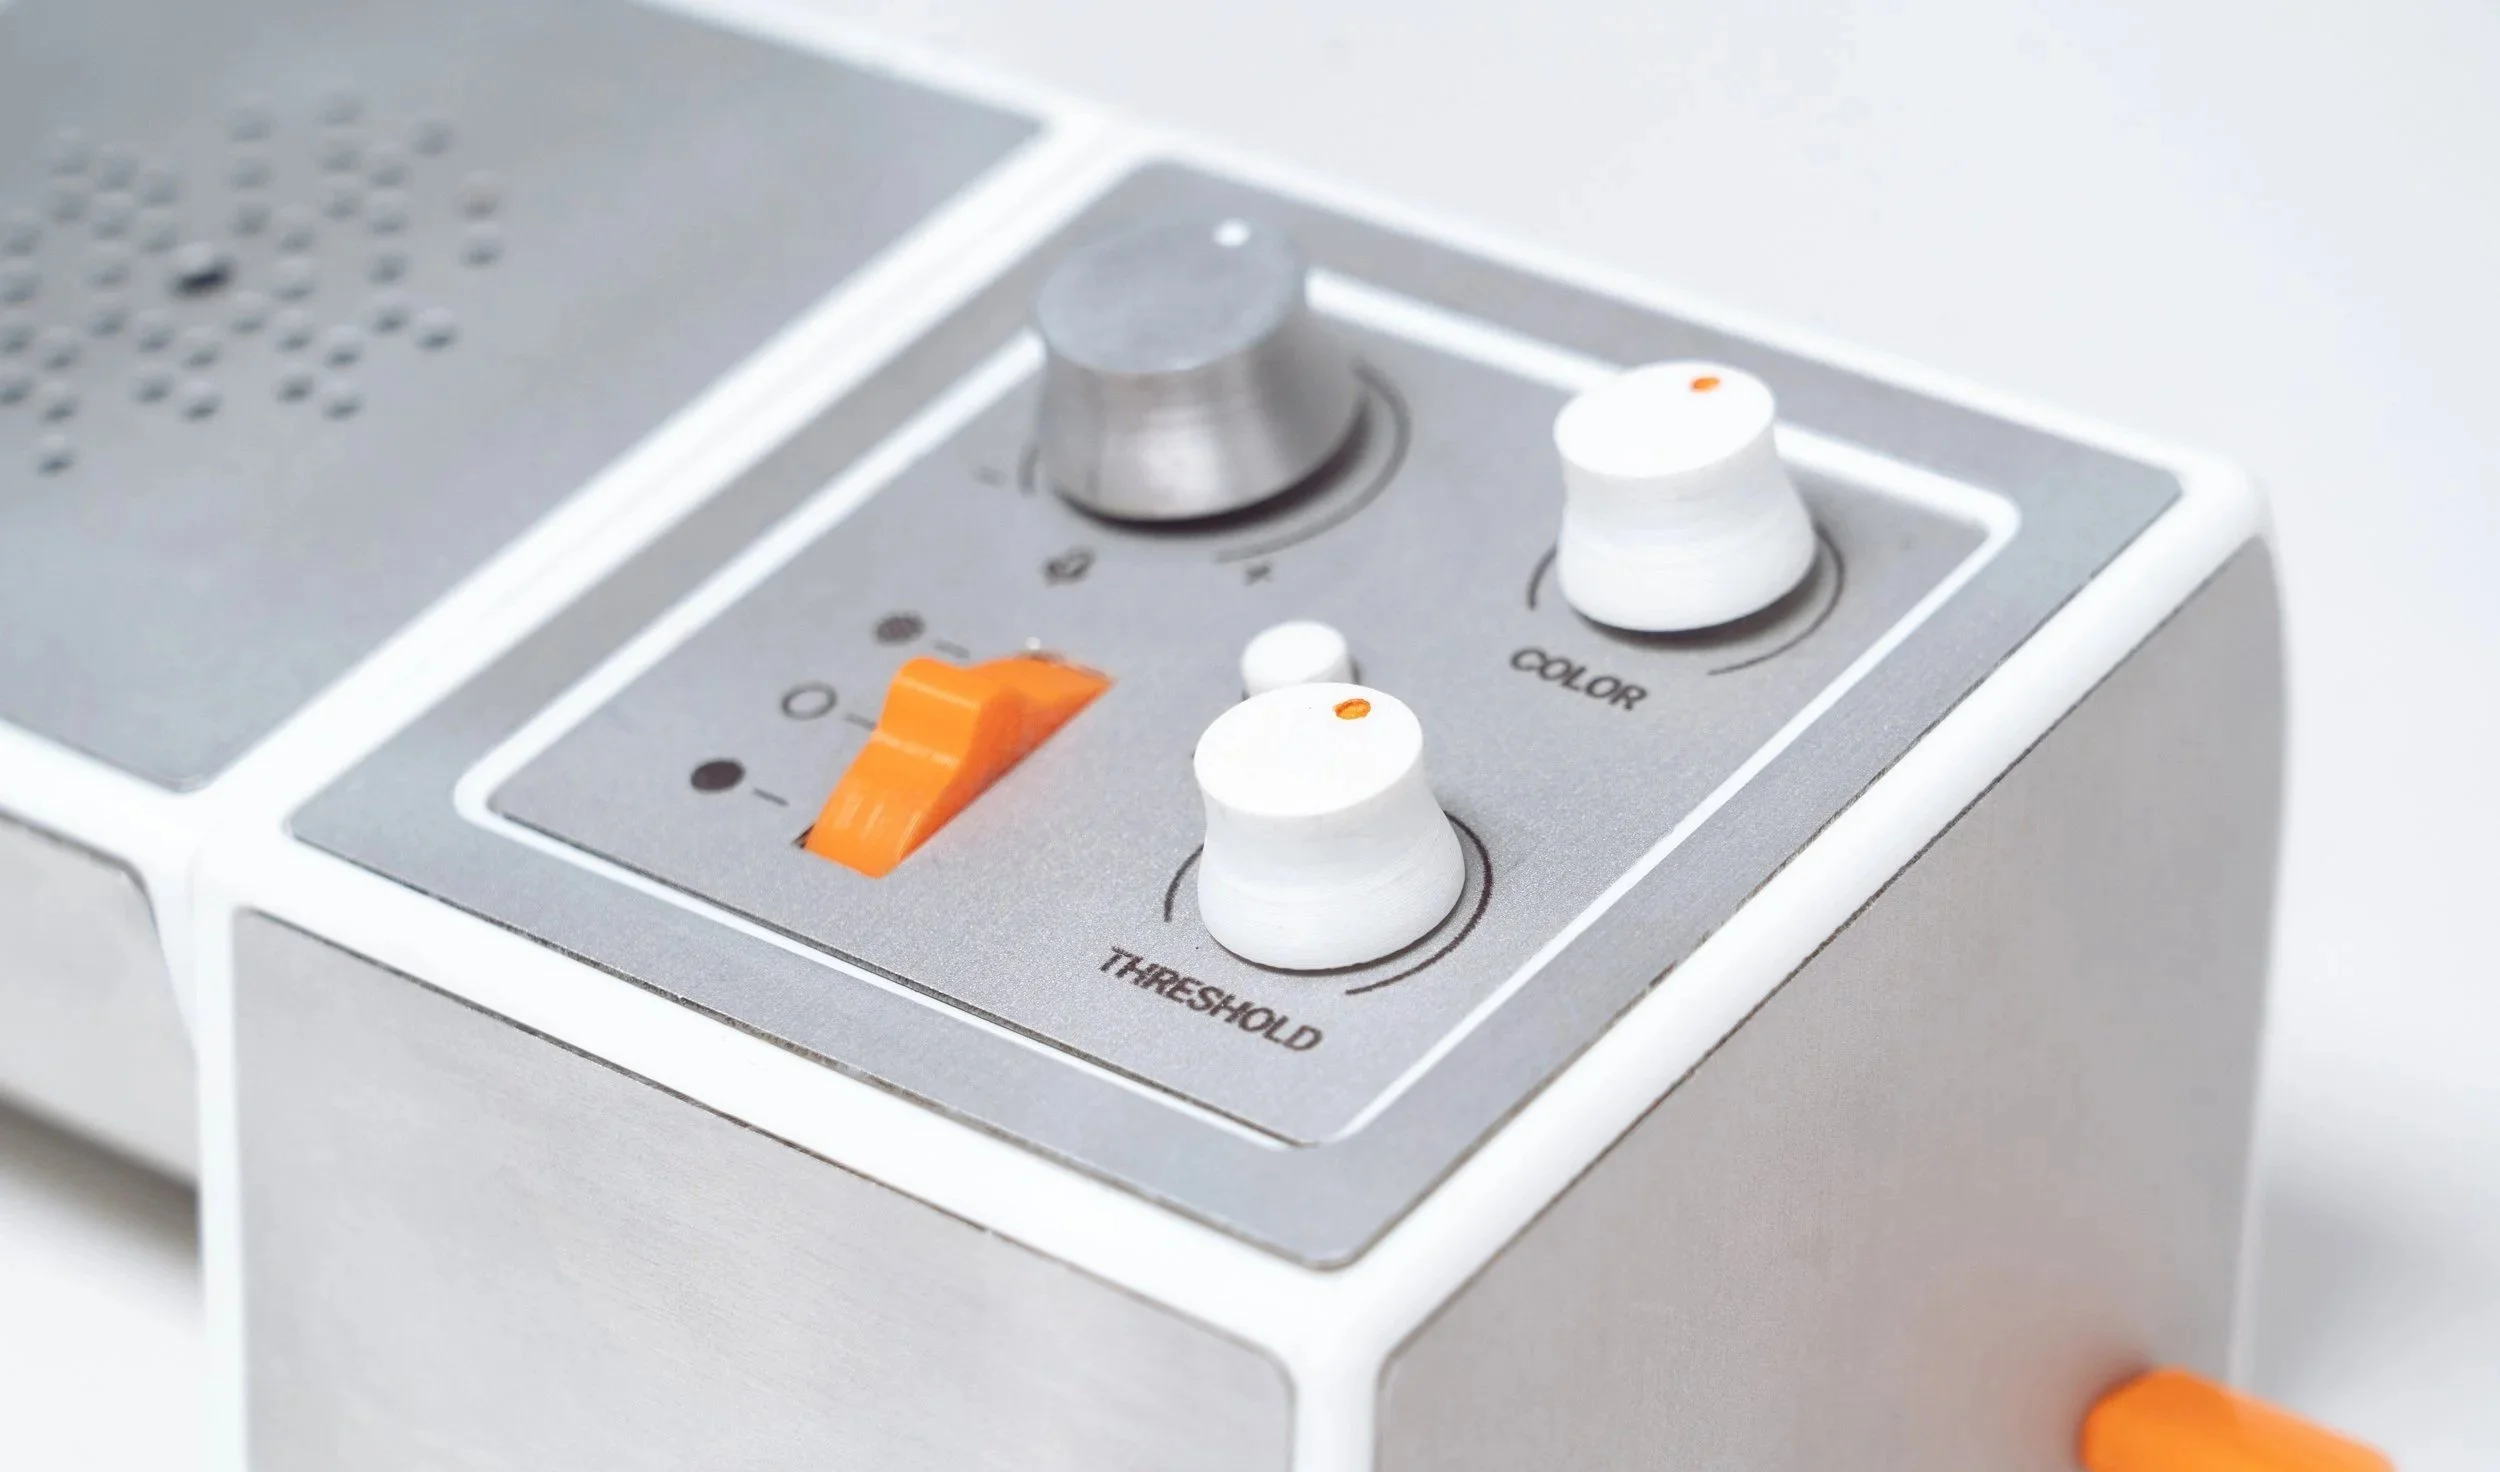
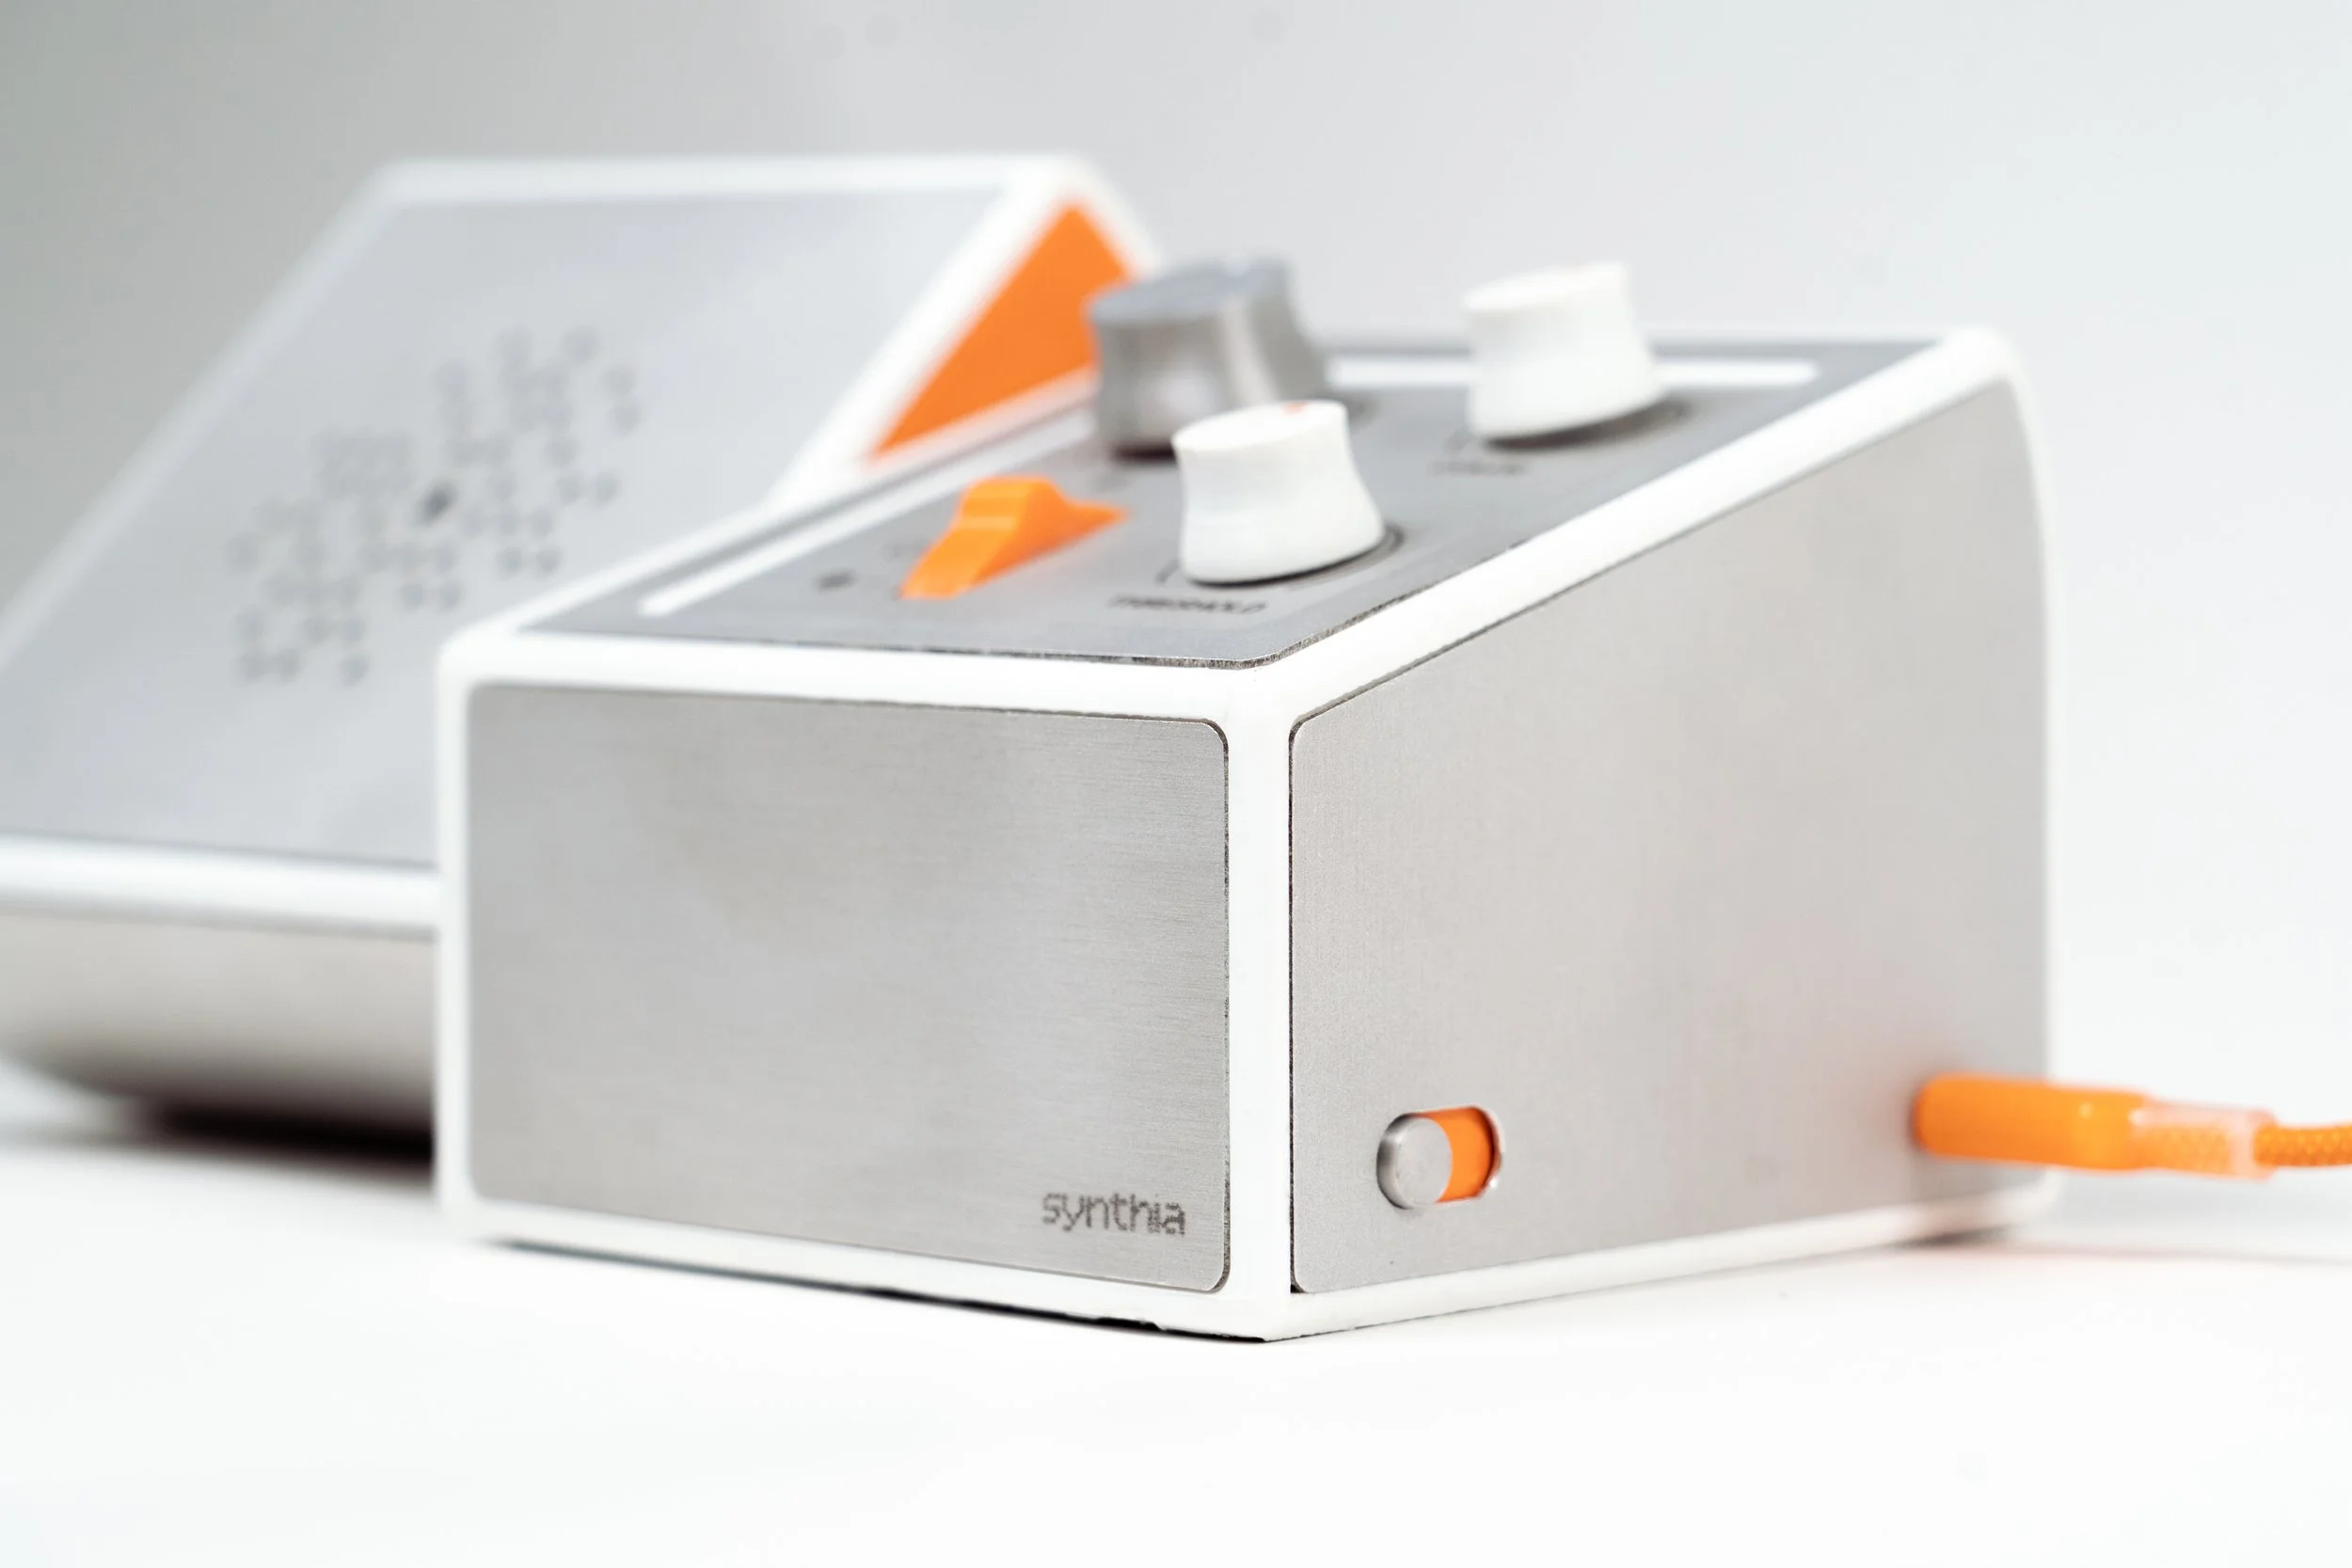
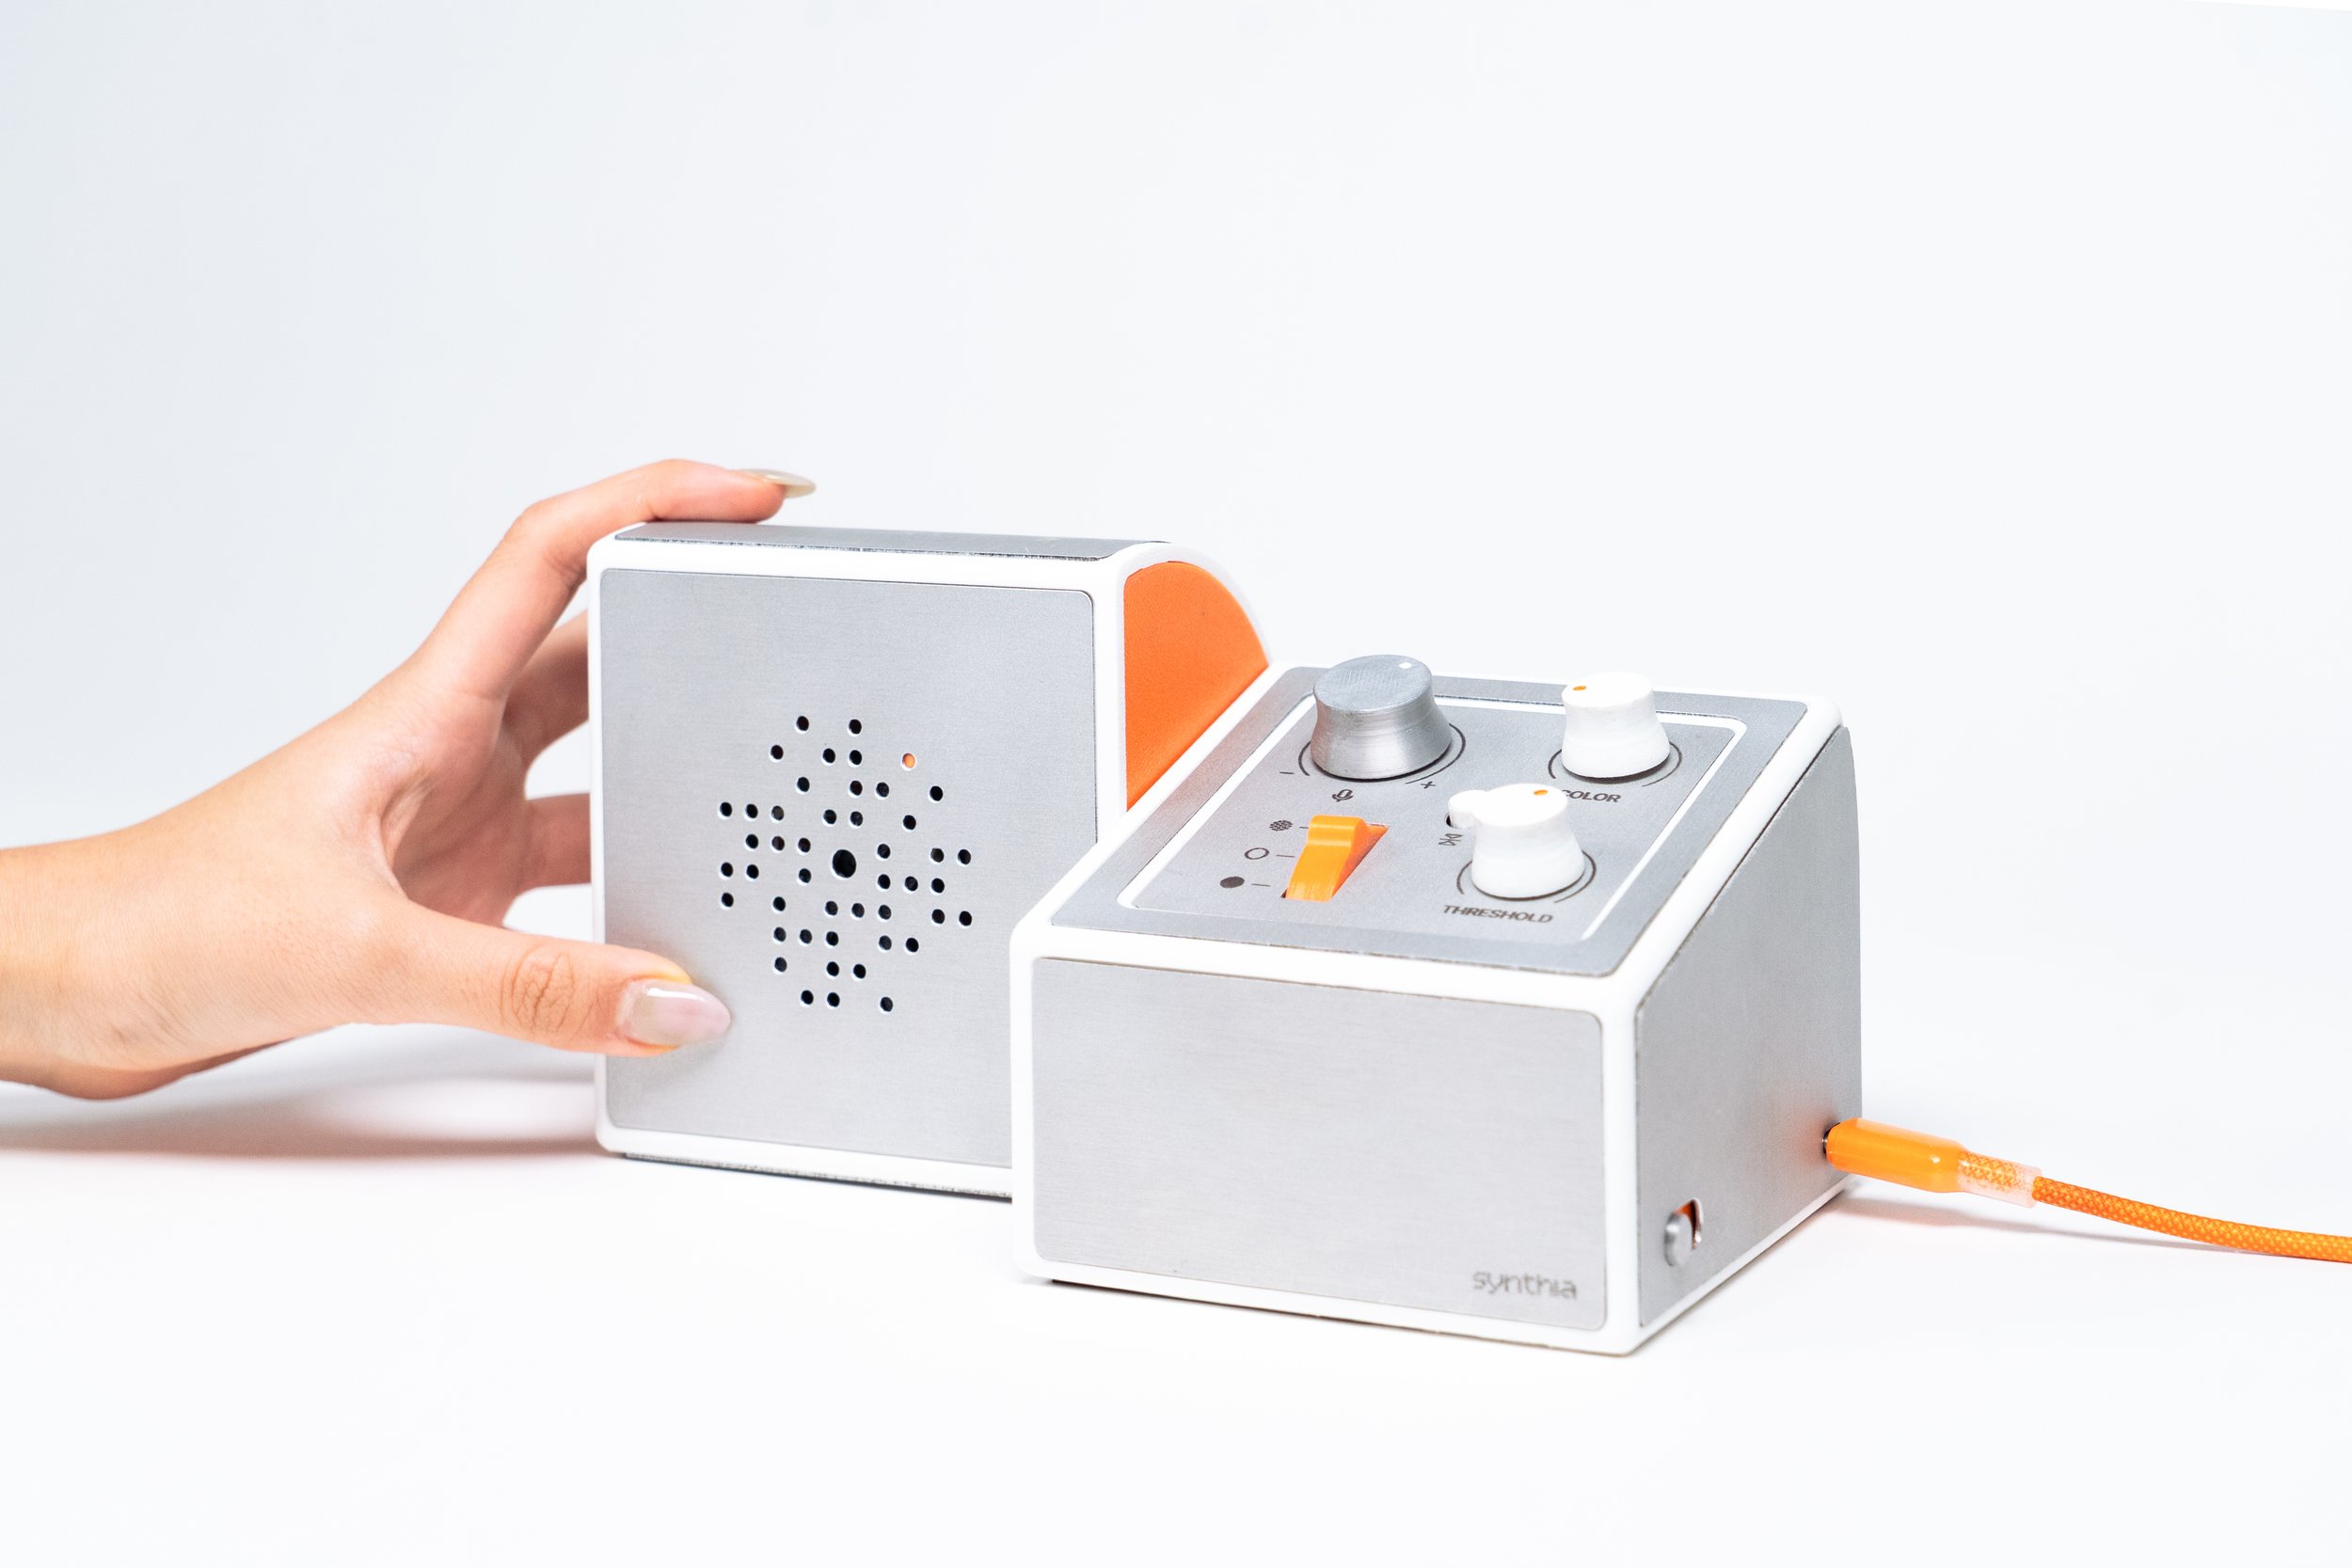
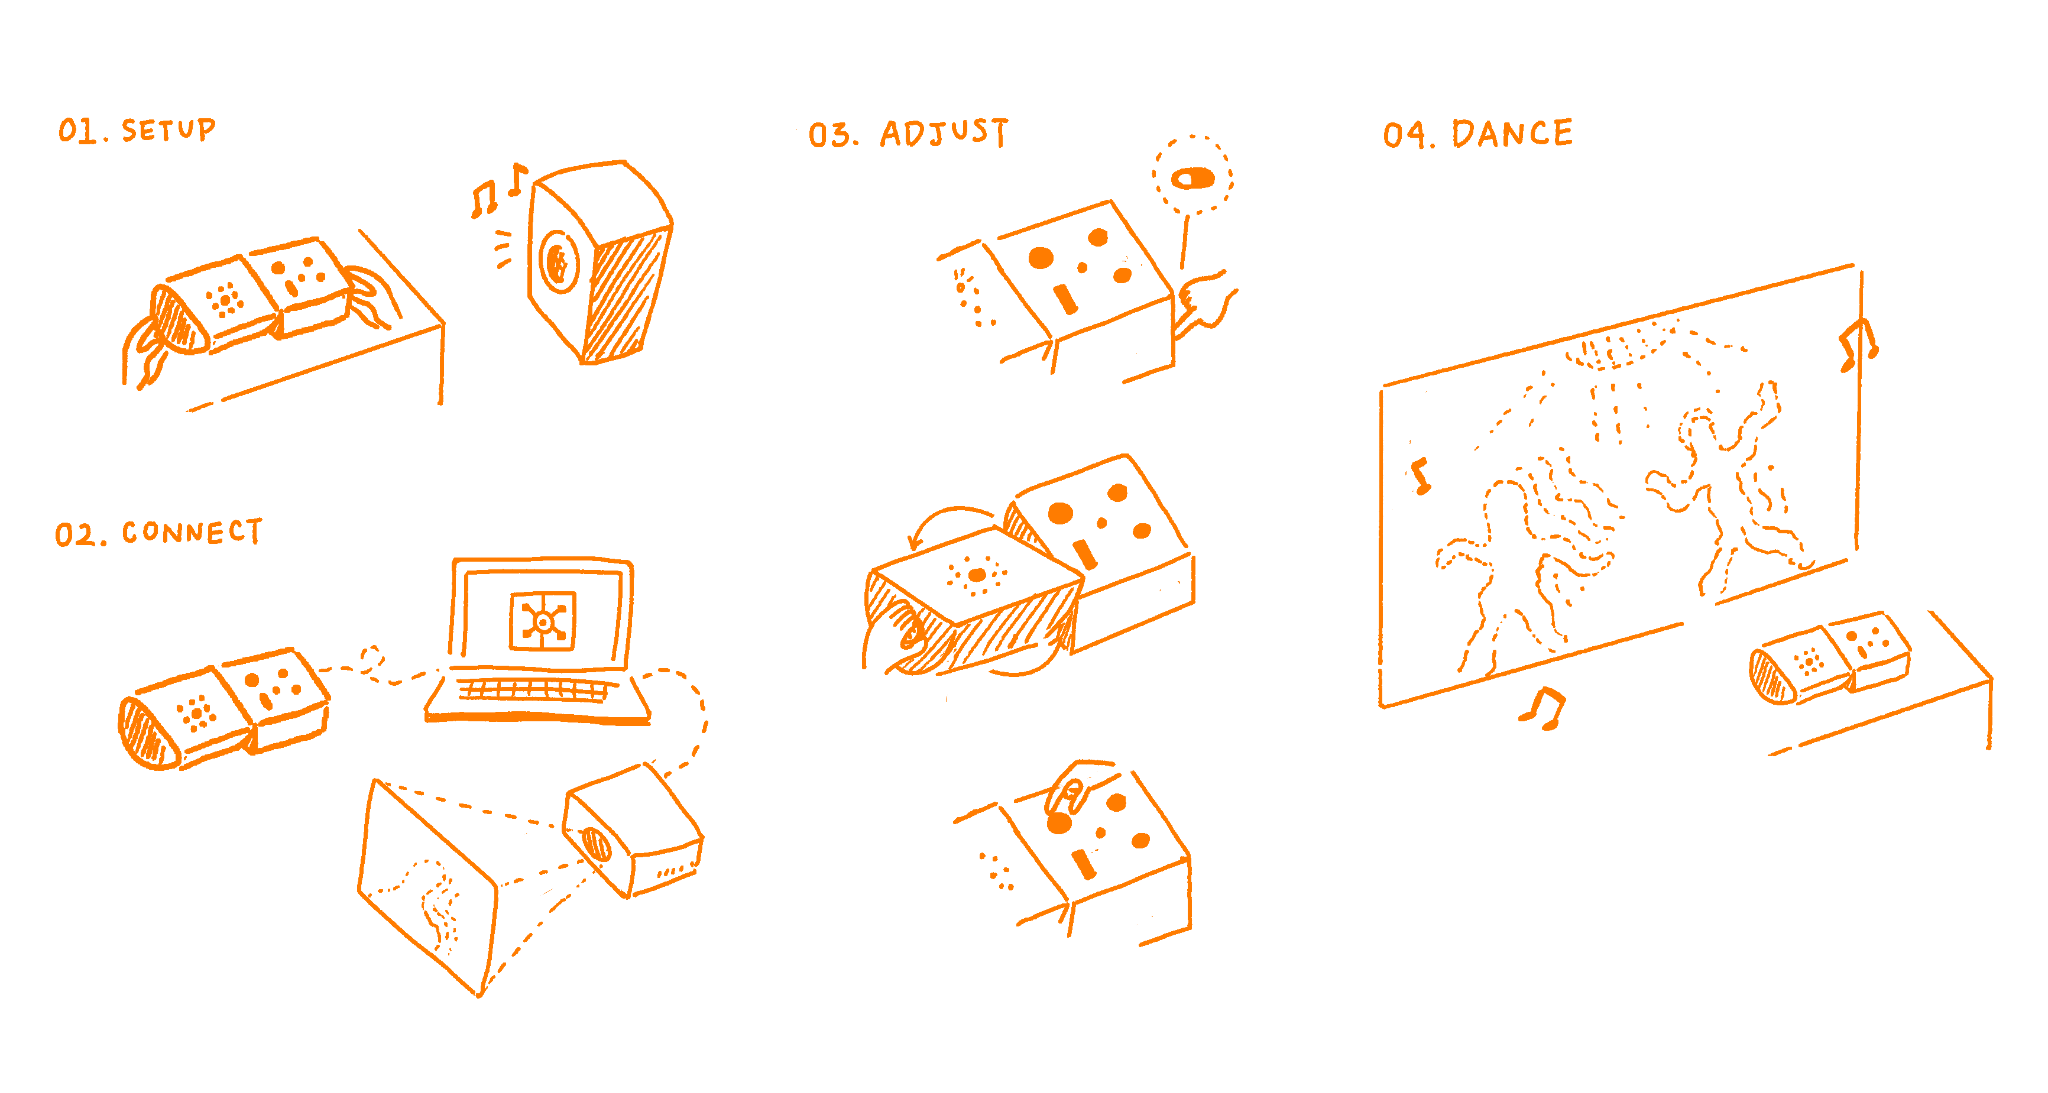
The user places Synthia near an audio source, such as a speaker playing music, or a DJ set up. Then Synthia is connected to a laptop running Touch Designer software, as well as a display such as a projector. Synthia is turned on using a power switch, also turning on an LED signifying that Synthia is processing visual and auditory information.
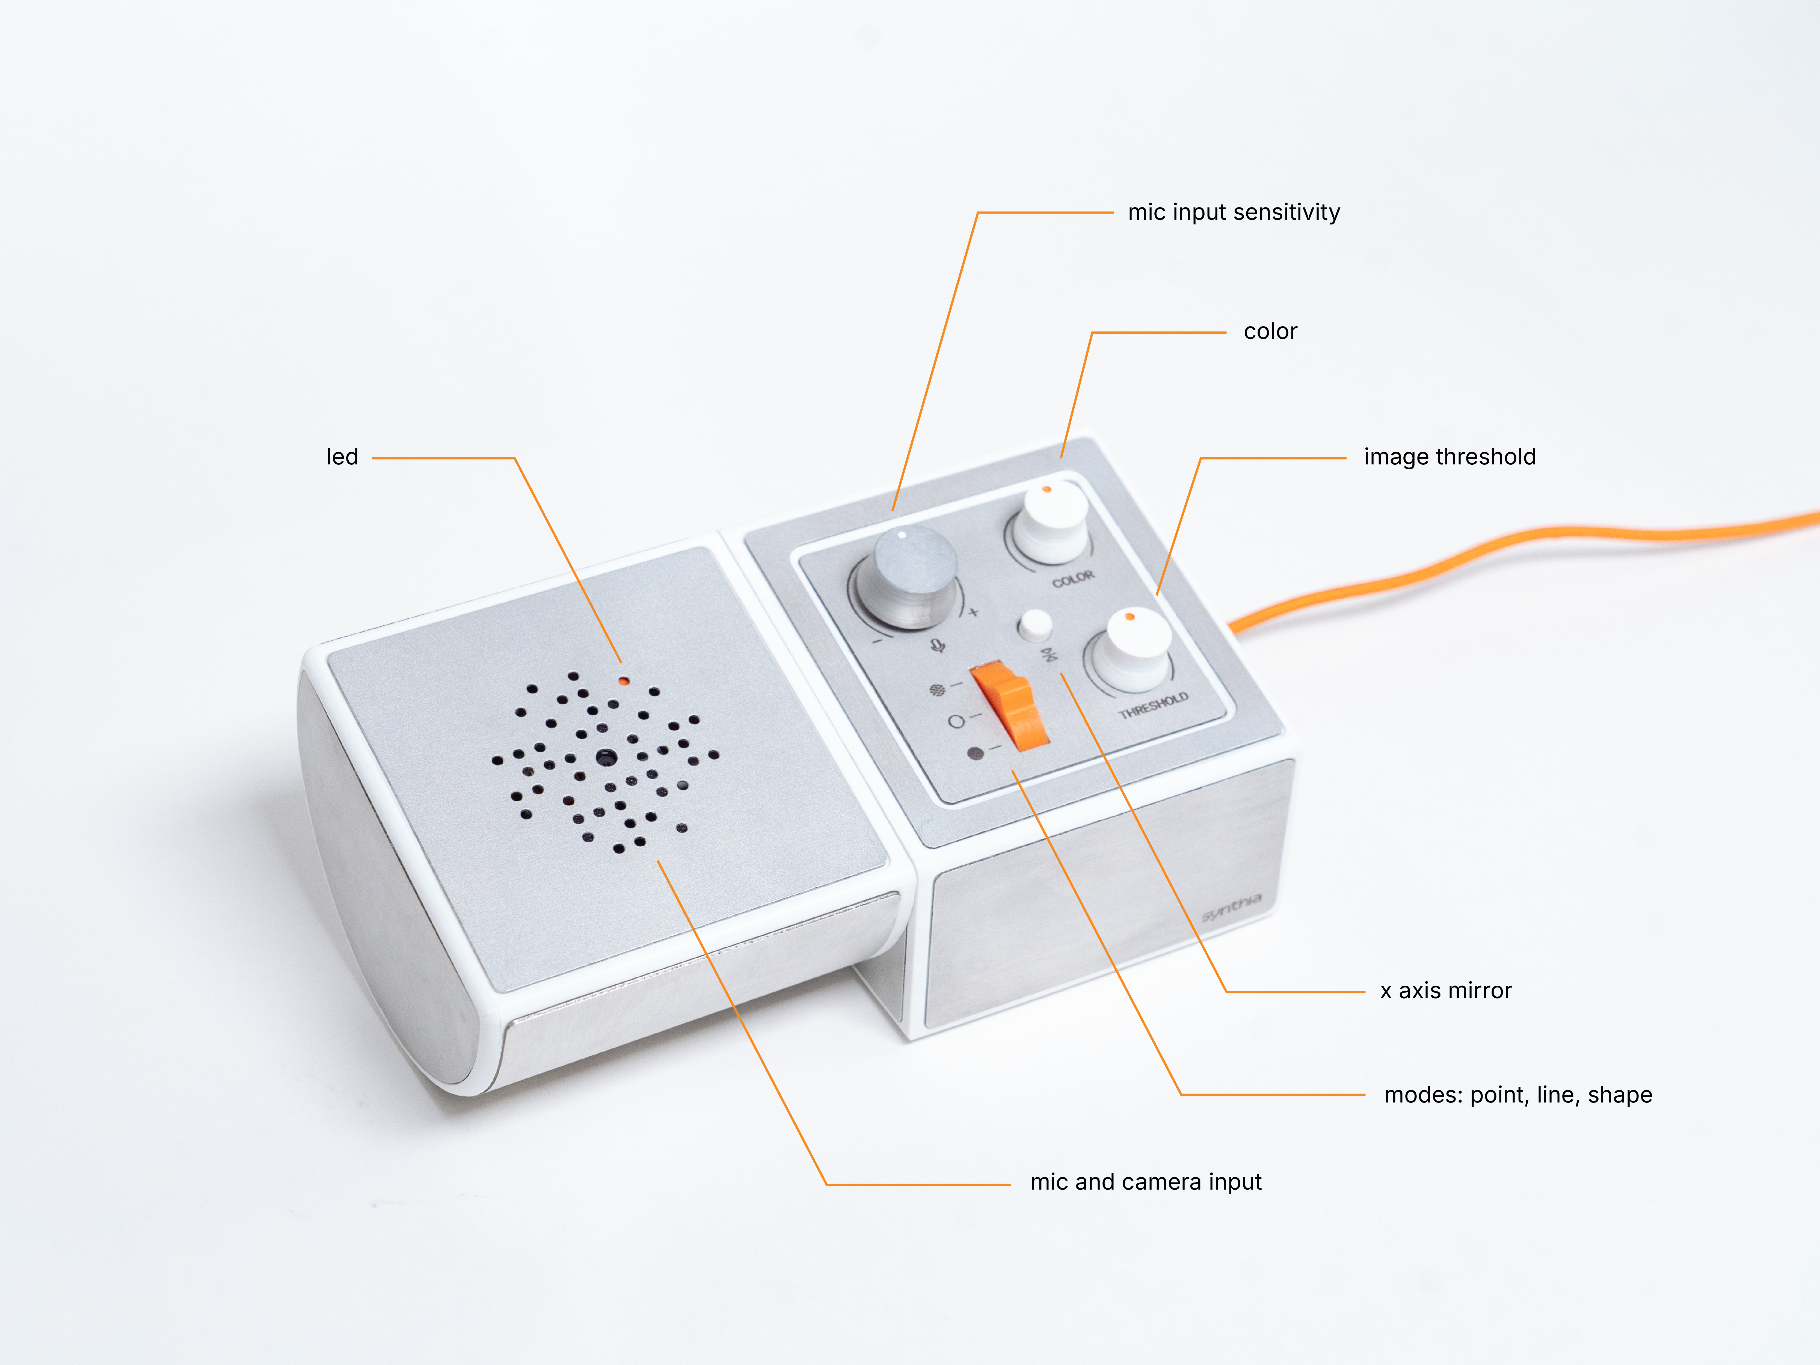
Turning Synthia’s left module changes the camera angle from pointing toward the DJ, to the audience and any range in between. To fine tune visuals, the right module’s panel allows users to change visual mode, color, image thresholding, mic sensitivity, and the x axis mirror.
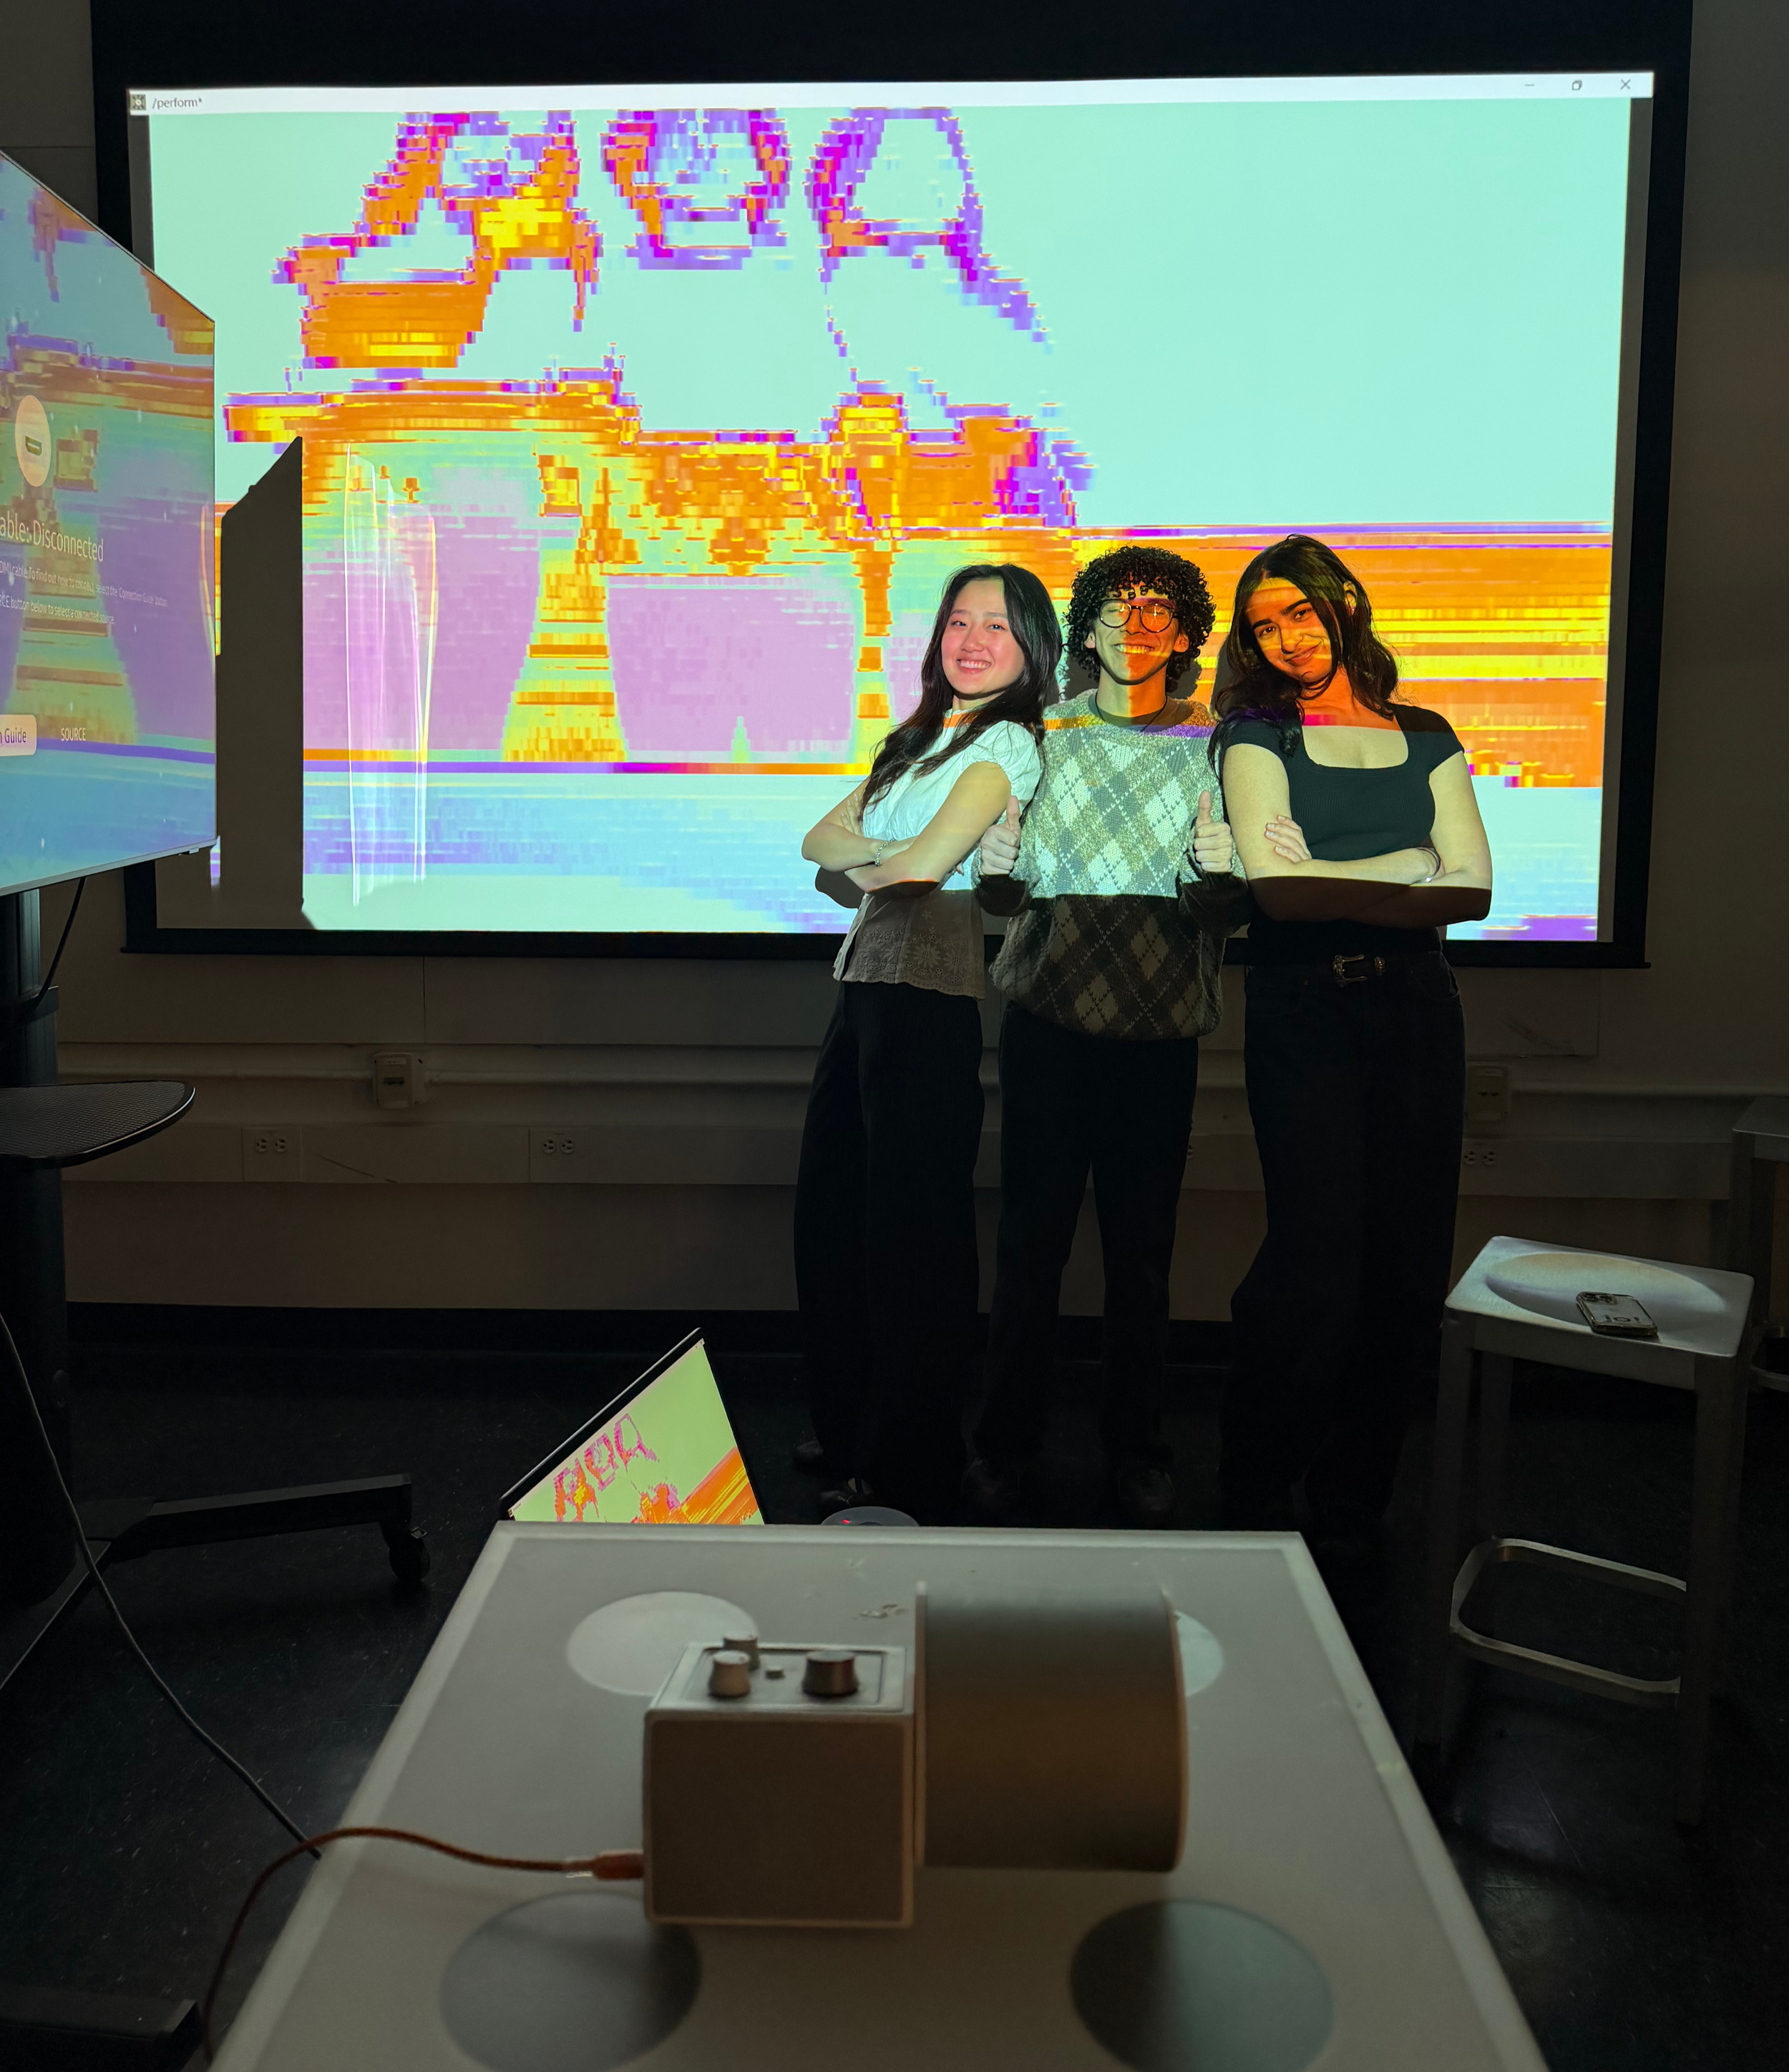
In Action
🔸
In Action 🔸
© Fred again.., Ezra Collective, CA7RIEL & Paco Amoroso - Beto’s Horns, Ezra Remix Visual Modes:
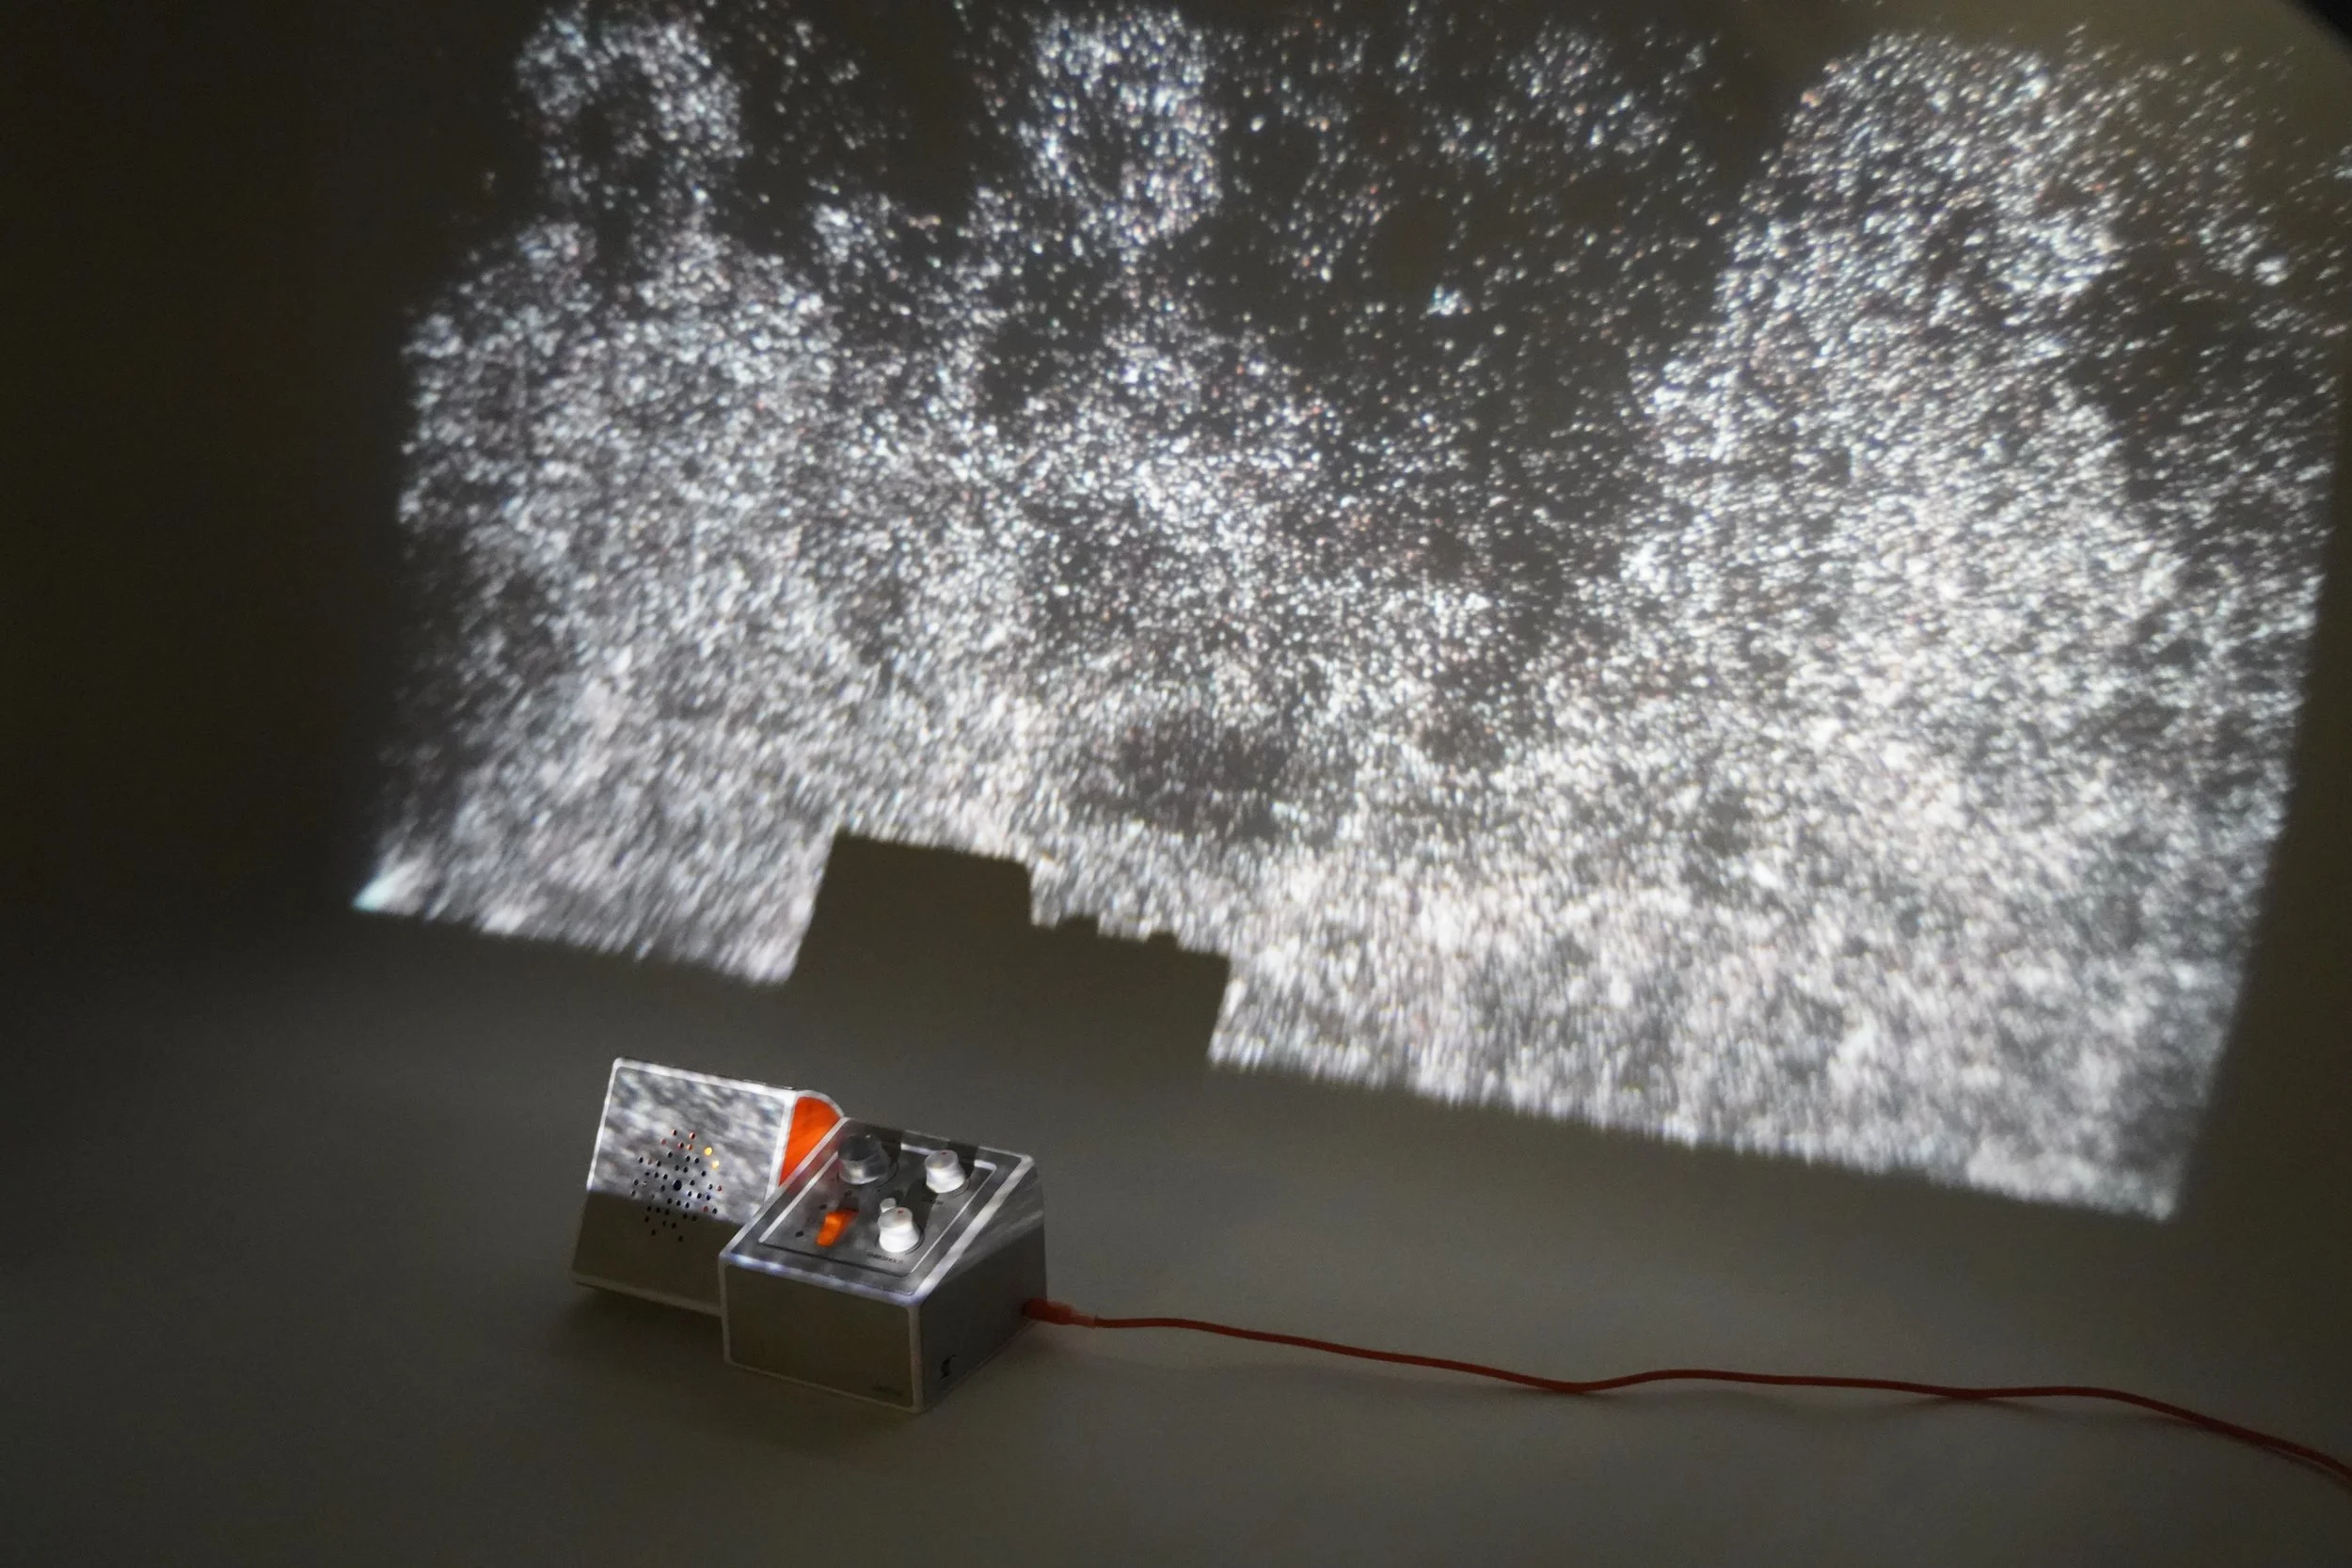
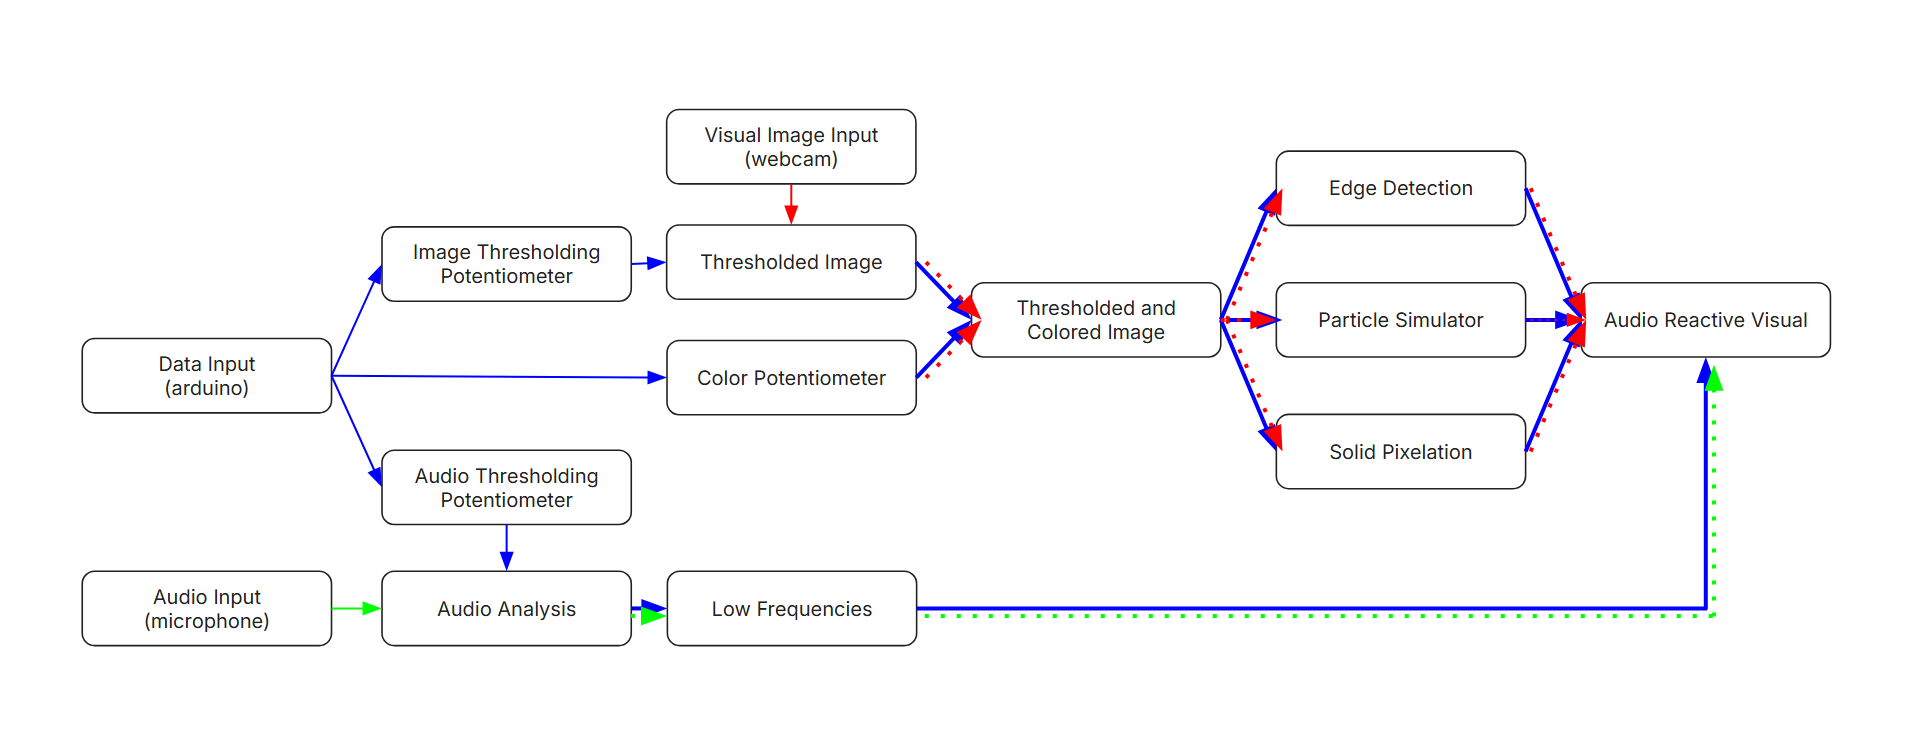
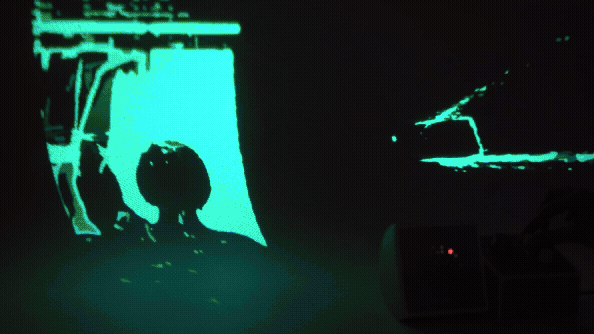
Synthia produces three different visual modes: edge detection, solid pixelation, and a particle simulator. Synthia utilizes a combination of TouchDesigner and Python to process and filter visual input, producing an audio-reactive result.
The visuals are finetuned using potentiometers attached to an Arduino. The logic map provides a guide on how the information is processed. The three visual modes can be seen below.


TouchDesigner File Exploration:
I completed all the visual processing in TouchDesigner. For each visual mode, the image is reduced to black and white values based on shade, and then processed either into edges, particles, or pixels. A potentiometer on the Arduino controls the image thresholding and color for each mode. The audio signals are processed into high, mid, and low frequencies. I combined the mid and low signals and adjusted the gain to reach a consistent range. The last potentiometer controls the audio frequency thresholding.
For the pixel mode, the audio signal controls the height of each pixel, causing the image to distort as audio spikes. For the edge detection mode, the audio controls a dry radial blur (seen as lines emanating). For the particle mode, the audio signal controls the particle velocity. Tours of the edge detection and particle simulator visual modes are seen below.
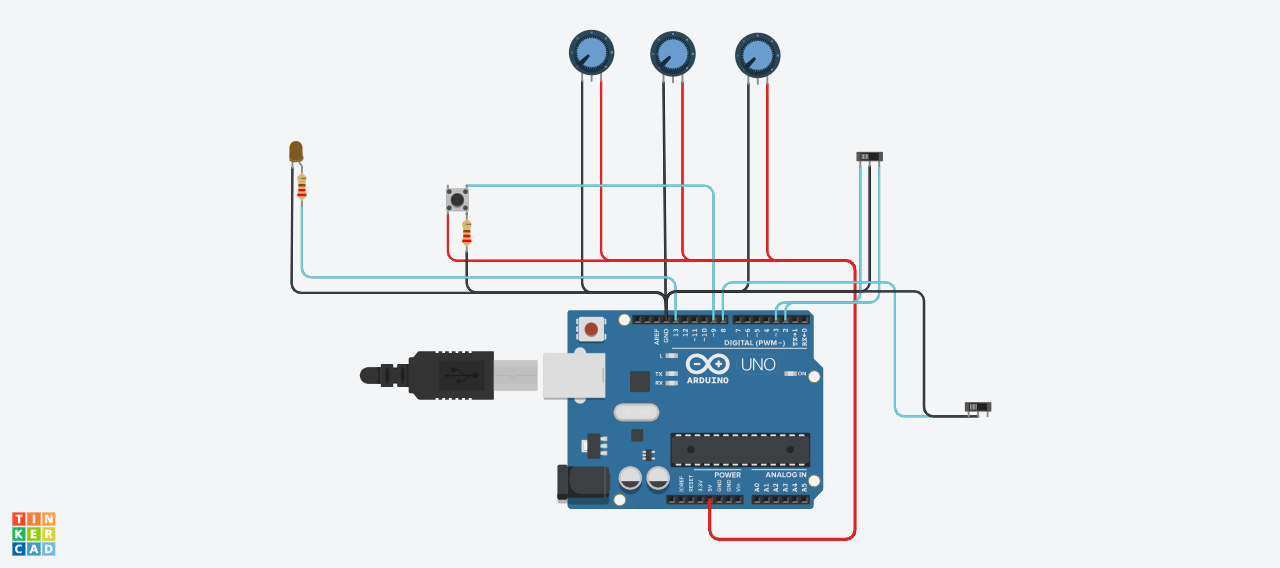
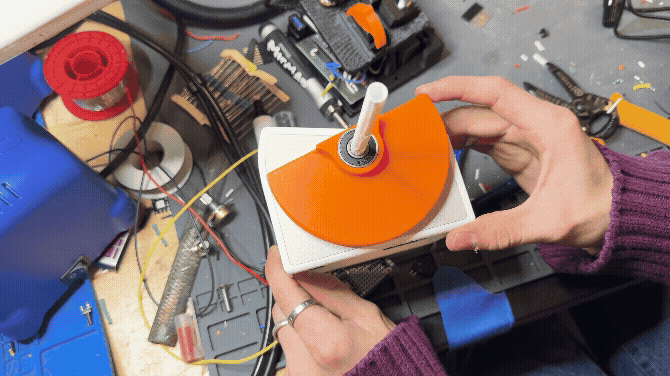
Electronics:
Synthia’s electronics backend runs on an Arduino Uno Rev. 3. The wiring diagram is displayed on the left. The elements provide the functionalities seen below:
Camera: Visual data input and audio data input
Roller Switch: On/Off button
LED: Visual confirmation of roller switch state change
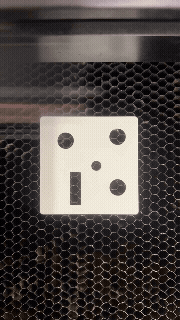
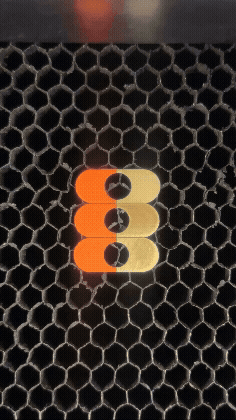
3 Stage Switch: Mode differentiation of produced visuals
Button: X Axis mirroring
Potentiometer 1: Image thresholding
Potentiometer 2: Color
Potentiometer 3: Mic sensitivity (strength of audio reactivity)
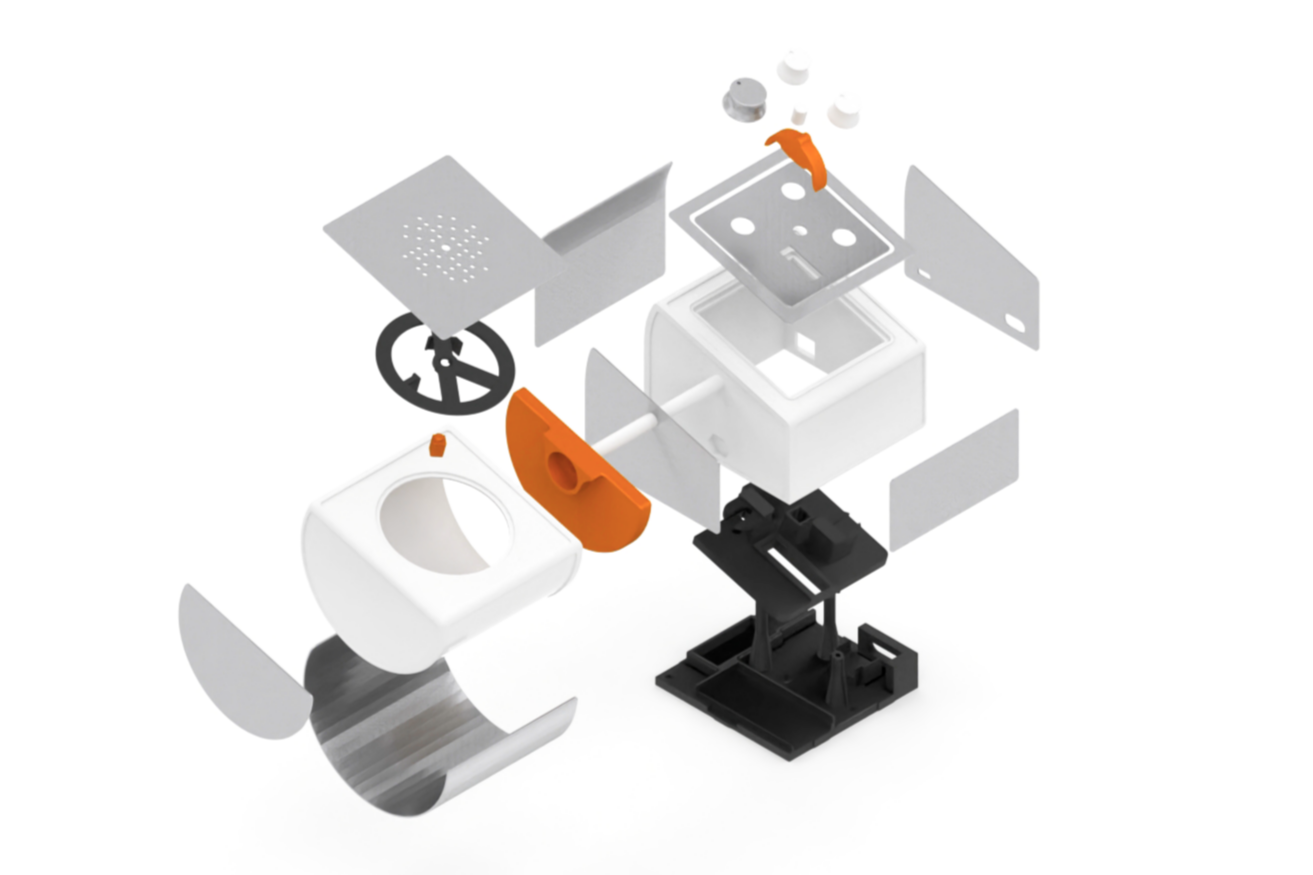
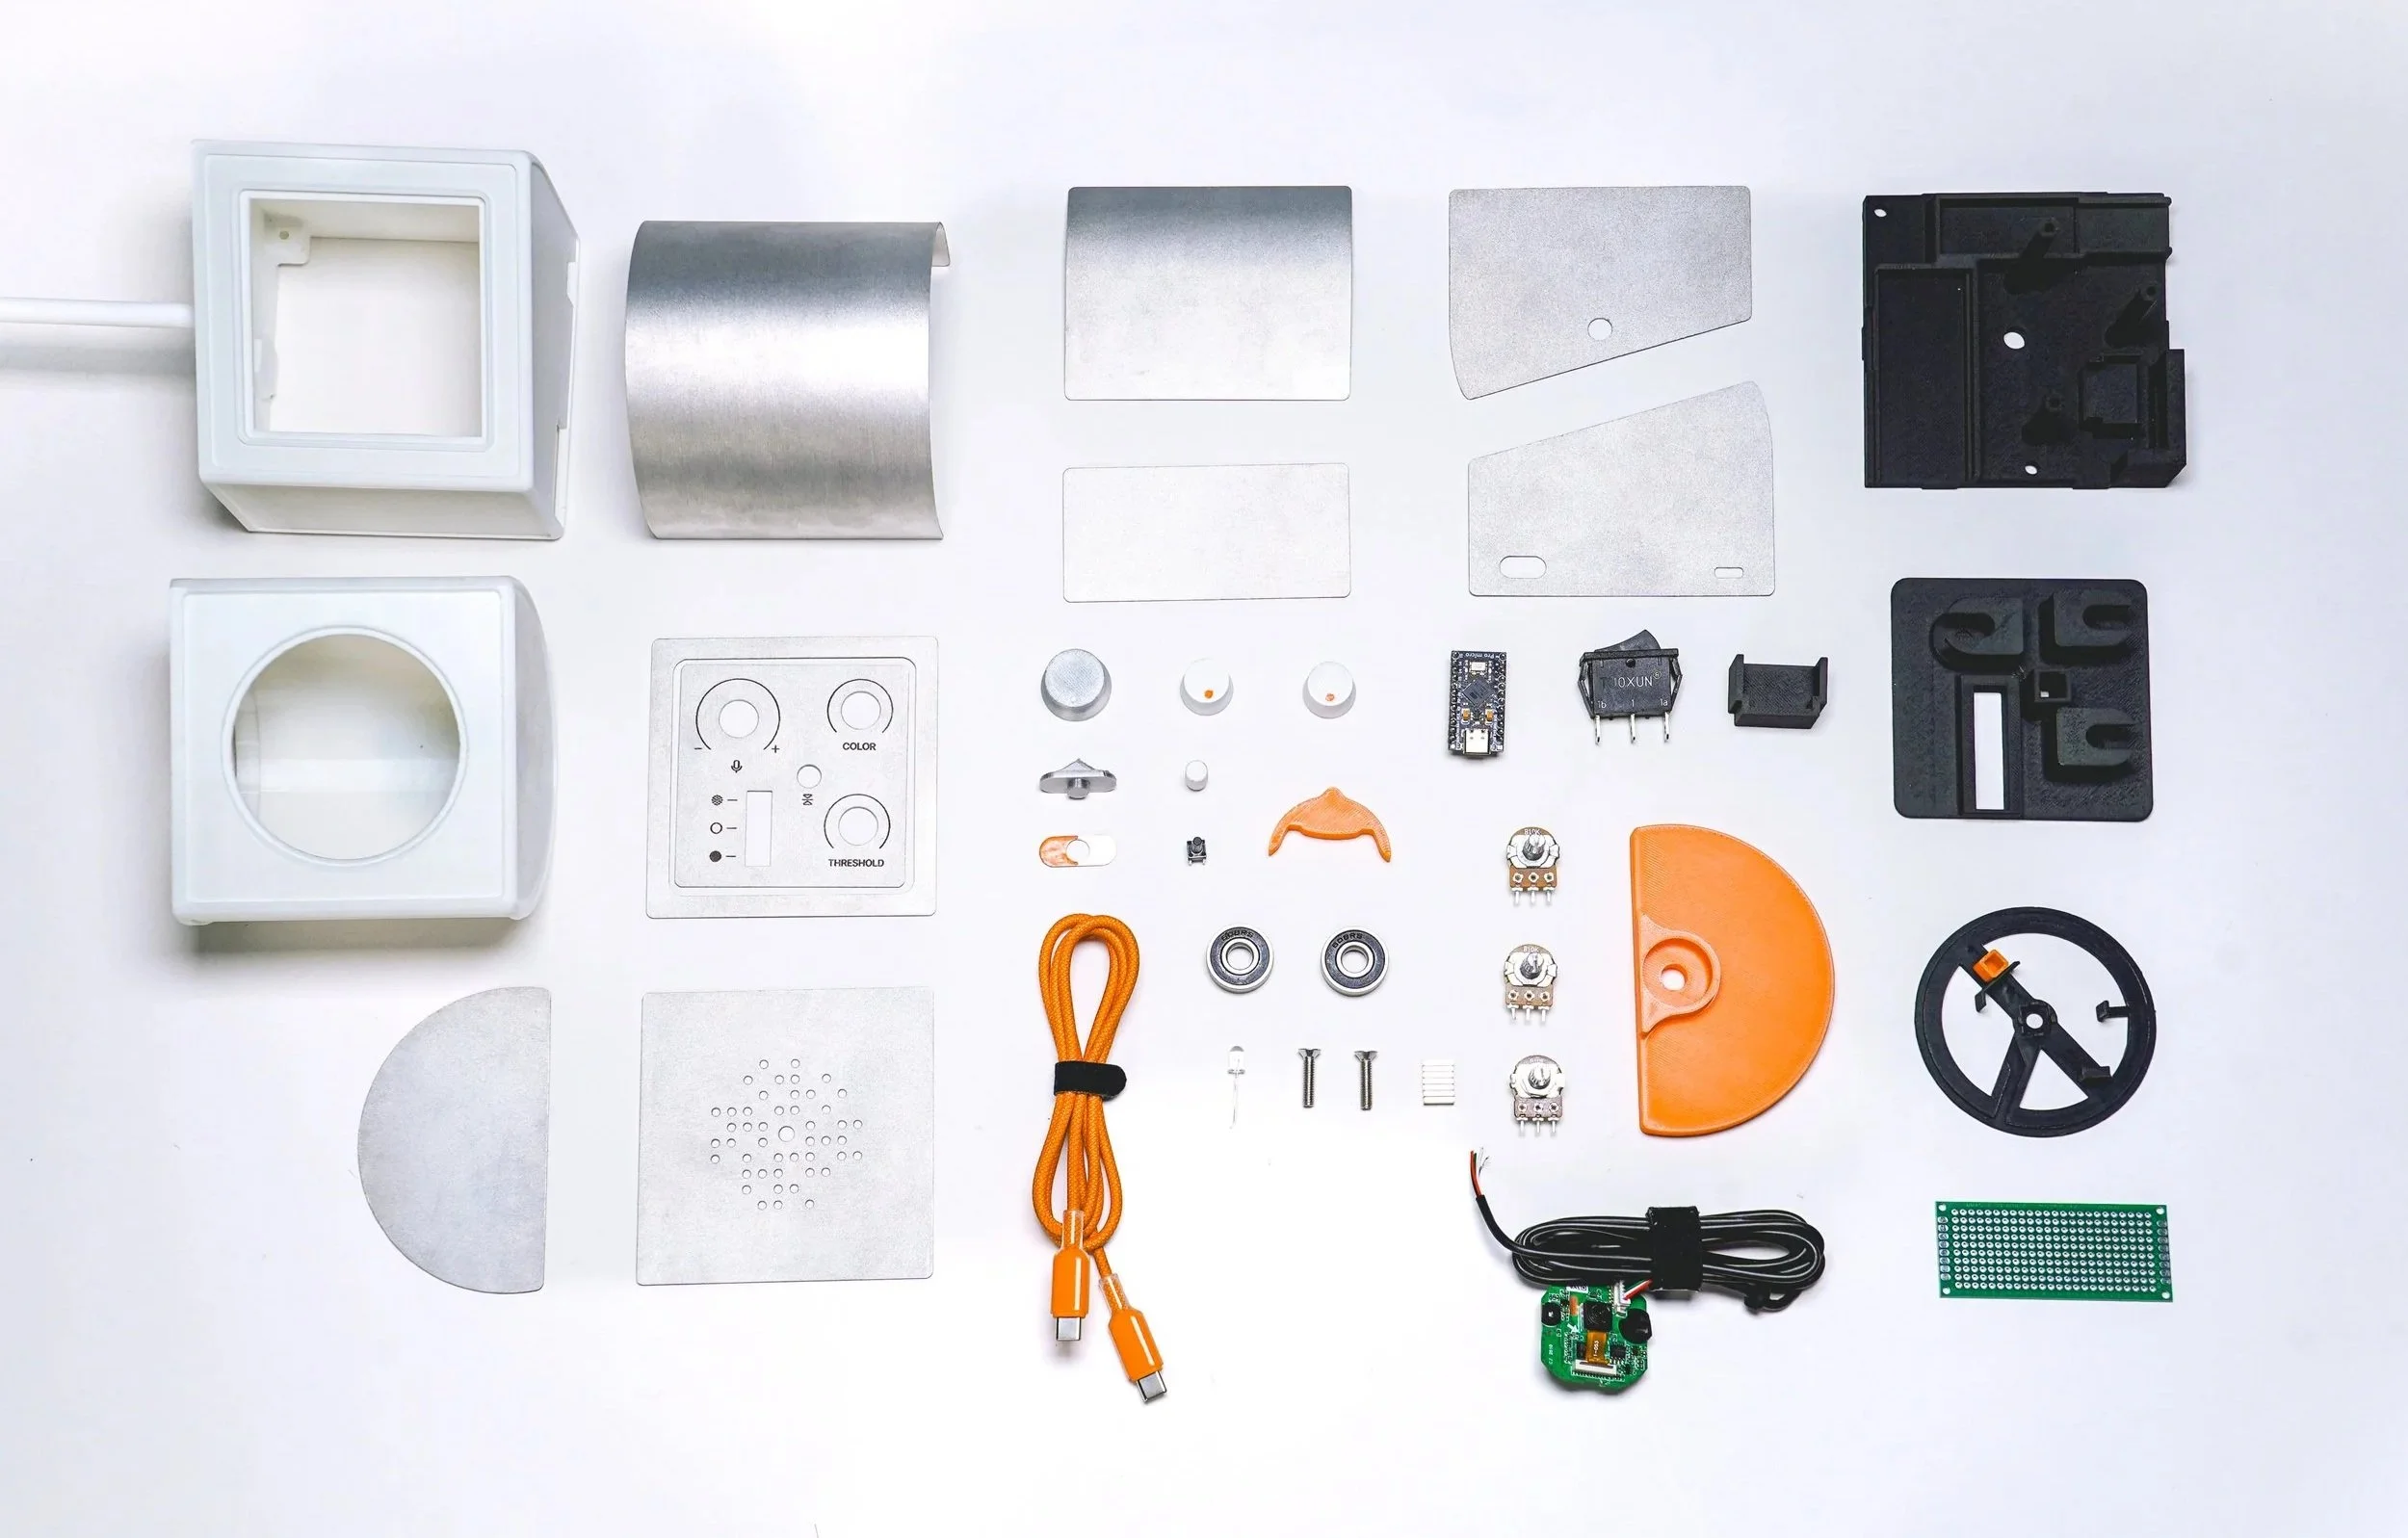
Assembly and Manufacturing:
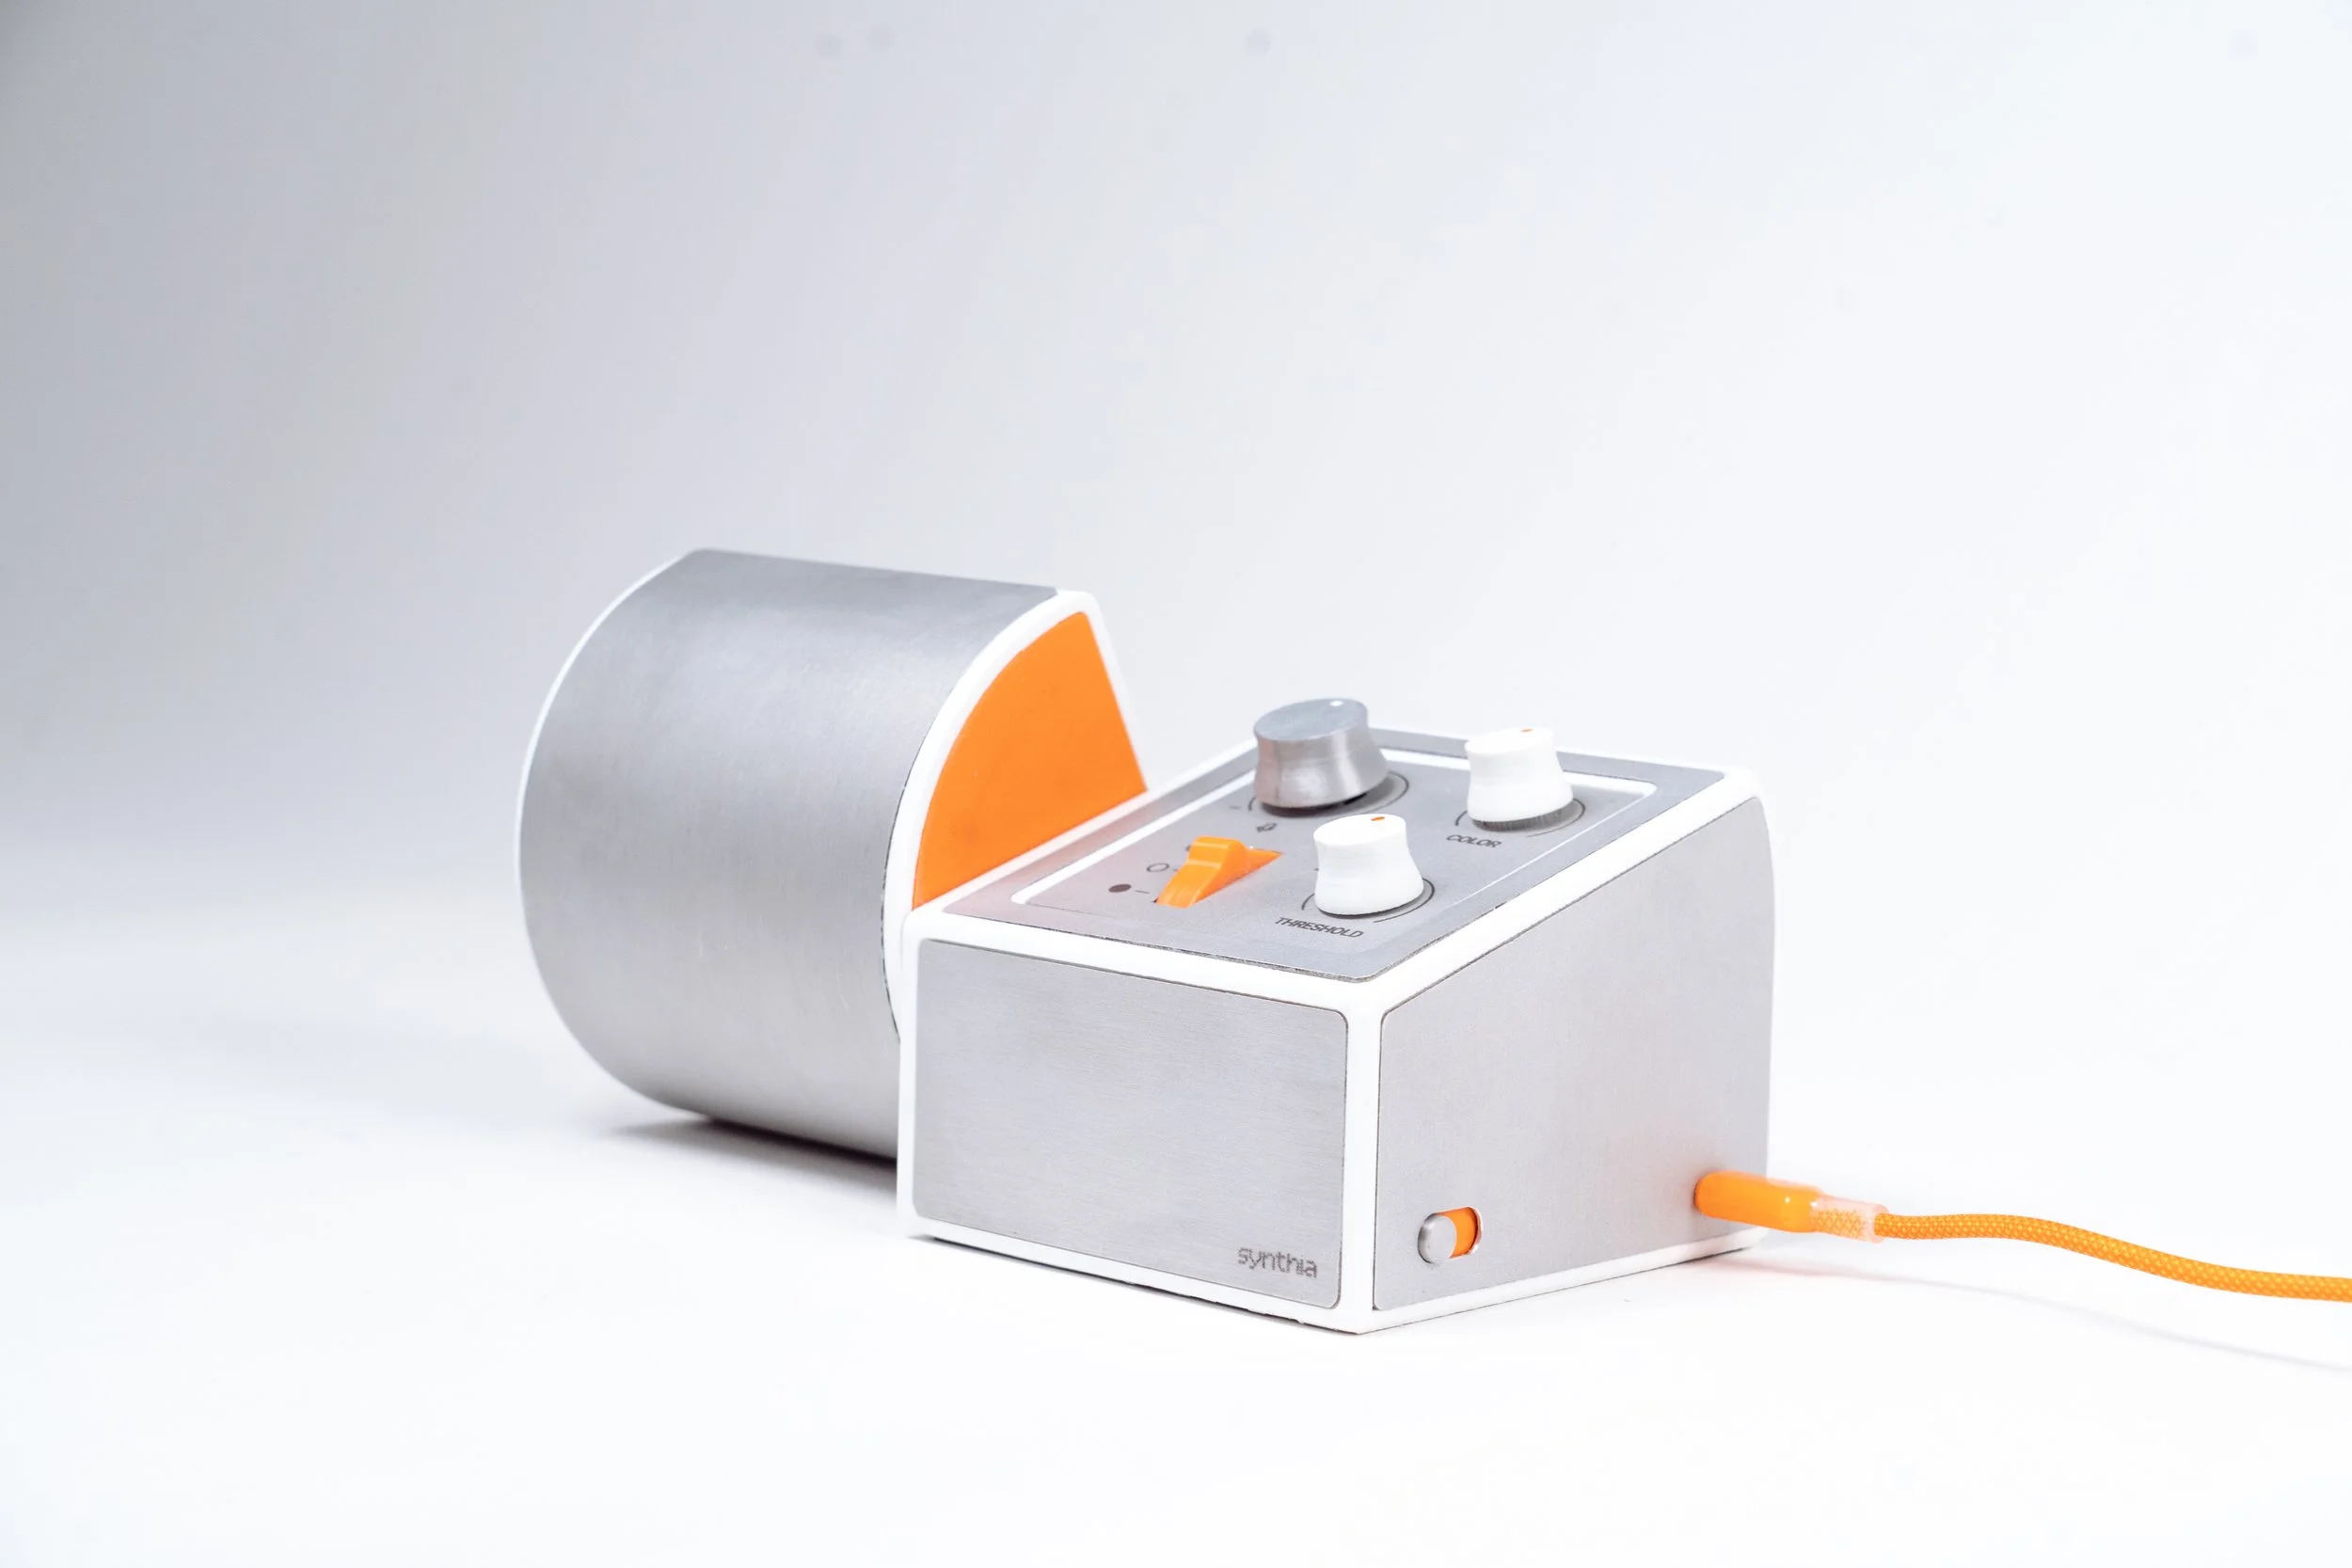
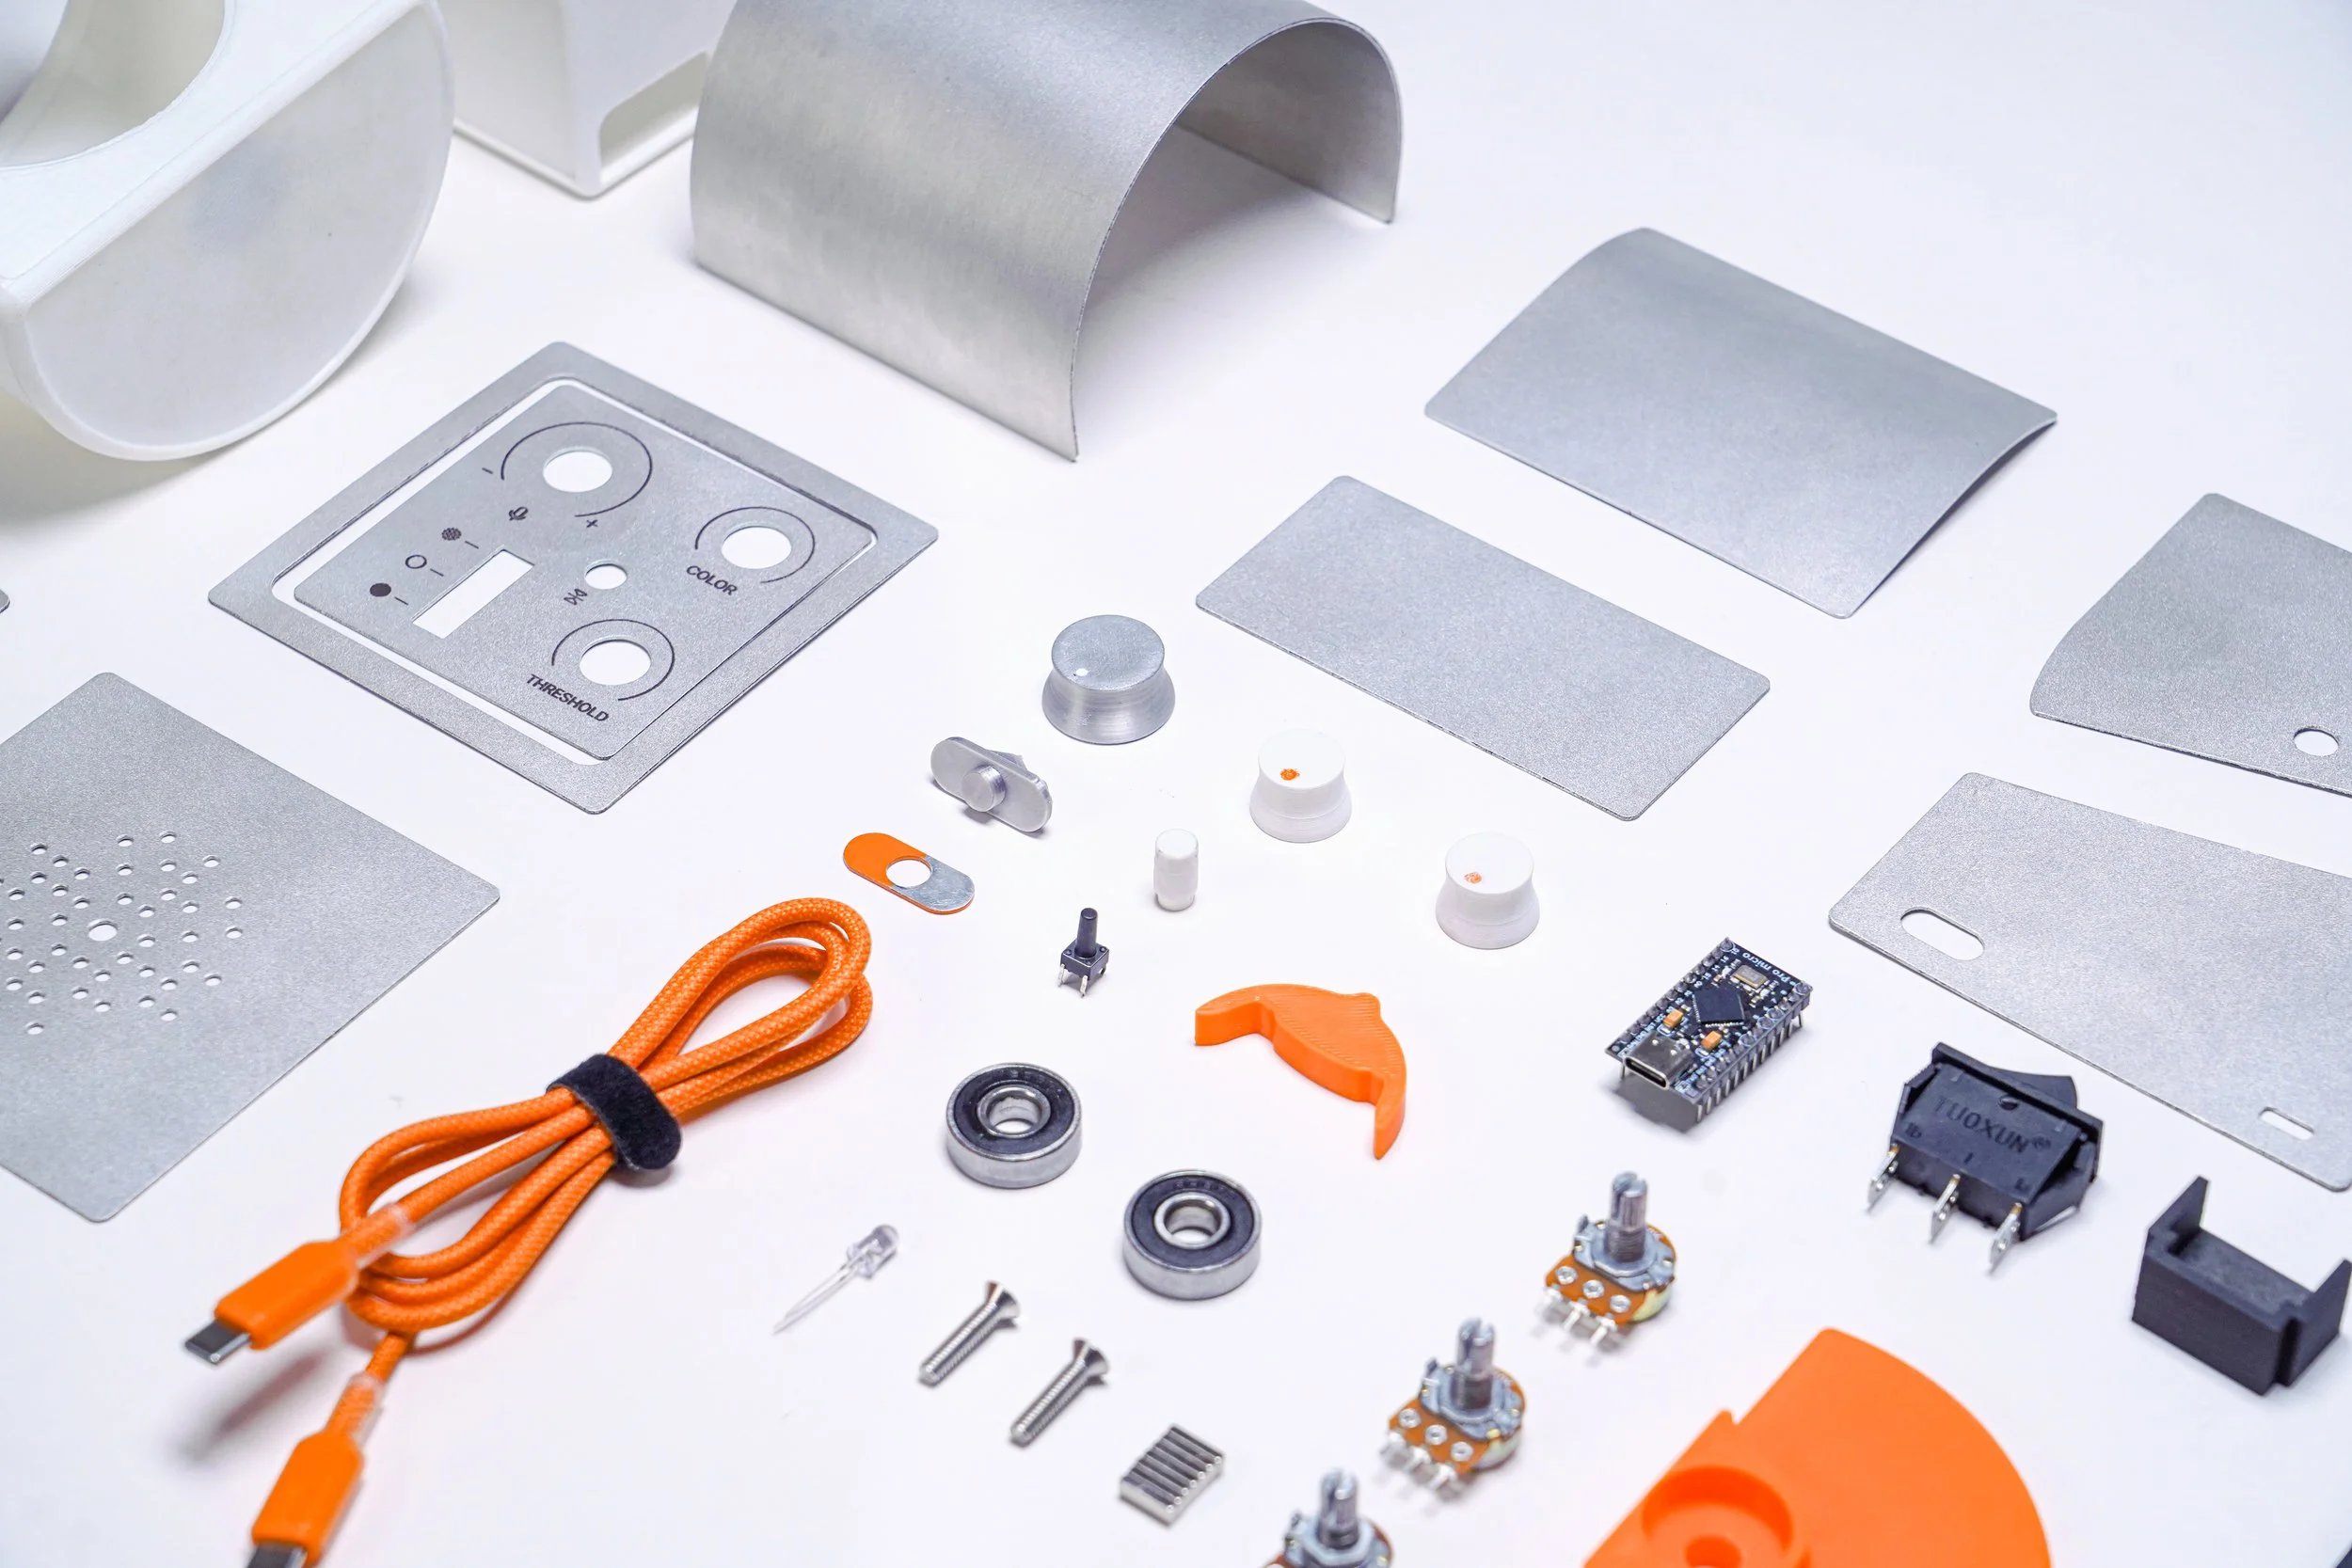
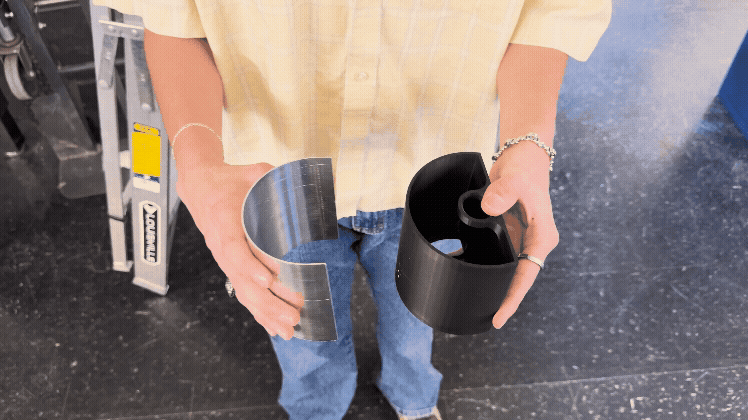
Synthia is made of a 3D printed PLA shell, inset with curved, sandblasted, and acrylic-sealed aluminum panels. The electronics are housed in a custom PLA casing, from the microcontroller to the tilted facing containing the potentiometers, to the webcam and LED. All switches have custom caps, whether printed or made from cut and powder-coated aluminum. The control panel is aluminum and laser-marked. All potentiometer knobs also have custom caps. The exploded CAD and layout of parts prior to assembly are seen below. All parts press-fit together and are superglued for additional stability.
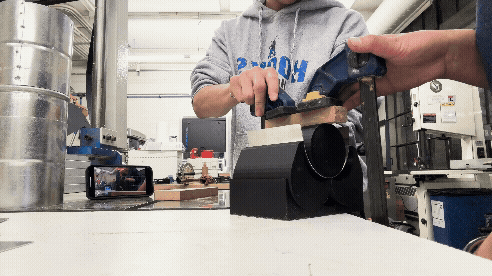
Aluminum Sheet Metal Forming Jig:
We designed Synthia’s two halves to be visually asymmetrical. One module is curved to encourage the user to rotate the camera, while the other is rectangular, with an inset control panel that draws interaction to the top surface.
We also committed to an outer aluminum finish, which required forming smooth, continuous curves without relying on visible fasteners or rivets.
To make this feasible, we designed and fabricated a custom 3D-printed bending jig that accounts for aluminum springback. The jig snap-fits onto the PLA camera housing, allowing us to form the aluminum accurately and repeatably across iterations.

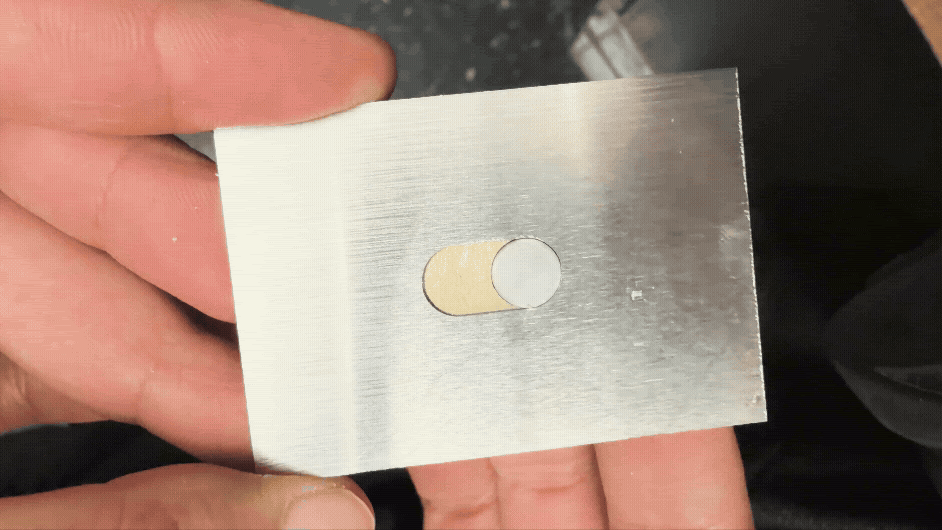
3 Stage Switch Cap:
Synthia’s three-stage switch allows the user to change between our three visual modes. However, the current switch often overshot the middle position for one of the extremes, did not match our desired aesthetic, and was difficult to integrate into the electronics housing.
I designed an ergonomic sliding switch cap that improves positional accuracy while maintaining visual consistency across Synthia’s color scheme and form factor. The new rectangular switch casing is easily customizable allowing for simple integration with existing electronics housing.

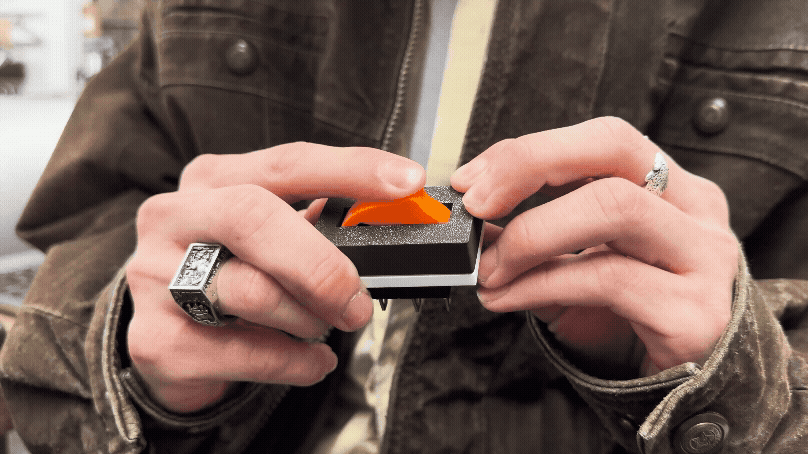
“Pop” of Orange:
Synthia uses orange as an accent color to invite interaction and signal functional feedback. This color appears on key touchpoints, including the three-stage switch, power switch, and cable. Its most pronounced application is the right-side panel of the camera module, which features inset magnets of varying sizes.
The orange panel visually cues the user that they are breaking the object’s top plane, while the embedded magnets provide tactile feedback that communicates rotation angle. When Synthia’s two halves align into a continuous plane, the largest magnet on the orange panel locks into position with the right-hand module.
Laser Marking:
The on/off switch was fabricated out of laser-cut aluminum sliding panels, powder-coated orange and selectively rastered. While successful, this process revealed limitations in consistency and required significant hand-finishing to achieve the desired surface quality.
We explored powder coating all aluminum panels in Pacific Silver to unify the appearance of reclaimed shop material. The intent was to apply a black base coat followed by silver, then raster away the top layer to expose control labels. However, variation in powder coat thickness made precise and repeatable labeling difficult. Instead we transitioned to sandblasting all panels for a consistent matte finish, then applied laser marking spray for high-contrast labeling, sealed with an acrylic clear coat for durability.